I once deployed untested changes directly to a client’s live e-commerce site on Black Friday. A single typo in functions.php brought down their entire store for 45 minutes during peak traffic. That $30,000 mistake taught me why professionals never skip local development.
Building a website directly on a live server is a gamble. One bad plugin update or a syntax error in your functions.php file can take down your entire storefront. Professionals don’t work this way because we use local development environments to build, test, and break things safely before a single byte of data hits the production server. Understanding how to install WordPress locally on Windows and Mac represents a core part of the professional workflow. This guide builds on our WordPress Basics and Installation foundation to help you master local development.
Understanding Local WordPress Development
It hosts the database, handles the PHP processing, and serves the files to your browser. By 2026, the tools for this have become incredibly sophisticated. You no longer need to manually configure Apache or MySQL in a complex stack if you want to move fast.
But you still need to understand the underlying architecture to maintain a stable environment.
Why Local WordPress Development is Non-Negotiable in 2026
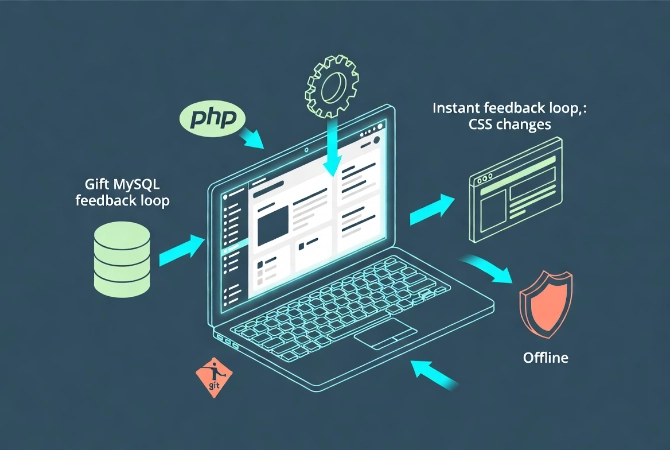
Speed is the primary factor driving local development adoption.
Even with the fastest fiber connections, latency exists when saving files to a remote server. Local environments eliminate this delay completely. You get instant feedback when you change a line of CSS or modify a block template.
Security Benefits of Local WordPress Development
Security represents another major driver for local development.
You can build an entire site in an offline environment where it’s invisible to bots and hackers. This proves particularly useful when you’re handling sensitive client data or testing new API integrations.
Local installs allow for easy version control. You can commit your changes to Git without worrying about unfinished code affecting your live visitors.
Choosing Your WordPress Local Development Environment
For 90 percent of developers, LocalWP is the correct choice.
It’s a specialized tool designed specifically for WordPress. It handles the “plumbing” of SSL certificates, site URLs, and database management. It works consistently across both Windows and Mac.
LocalWP vs. Docker for WordPress
Some enterprise teams prefer Docker or Lando.
These tools work better if you need to mirror a specific, complex server configuration exactly. Docker containers allow you to define the exact version of Linux, Nginx, and PHP your host uses.
For this guide, we focus on the most efficient path, which is using LocalWP, as it balances power with speed.
How to Install WordPress Locally on Windows
Windows users often face specific hurdles with file permissions and port conflicts.
Follow these steps to get a clean installation.
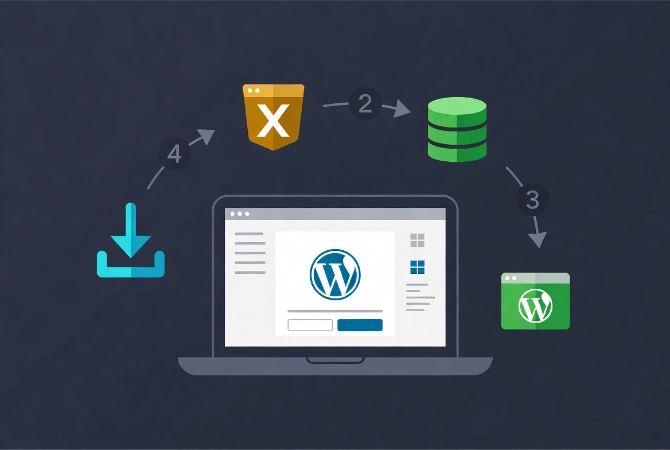
Step 1: Download and Install LocalWP on Windows
Download the latest stable version of LocalWP from their official site.
Run the executable. If Windows Defender or your firewall asks for permission, grant it. The software needs to modify your “hosts” file to map your local site names (like mysite.local) to your machine.
Step 2: Create Your First Local WordPress Site
Once installed, open the application and click the plus icon to create a new site.
1
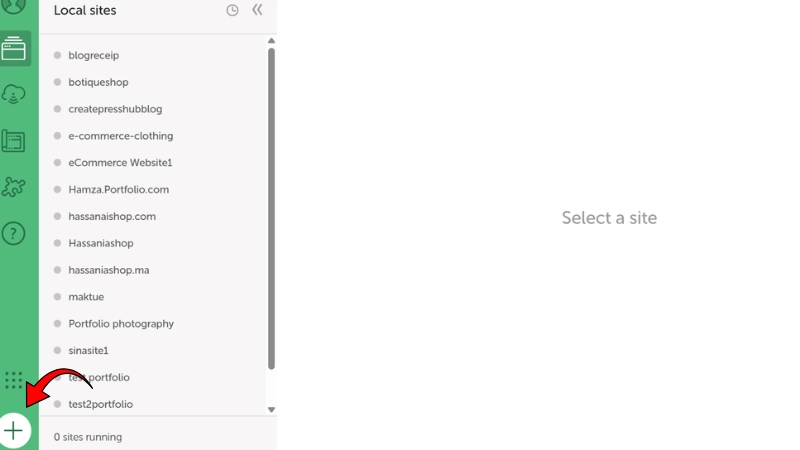
2
3
4
5
Step 3: Fix Windows Port 80 Conflicts
Windows frequently runs into “Port 80” issues.
Other applications, like Skype or certain system services, often claim this port. If LocalWP tells you the port is in use, go to the settings and change the “Router Mode” from Site Domains to Localhost. This fixes the conflict immediately.
How to Install WordPress Locally on Mac
Mac installation is generally smoother due to the Unix-based architecture of macOS.
However, the transition to Apple Silicon (M1, M2, M3, and M4 chips) changed how we handle virtualization.
Step 1: Download LocalWP for Apple Silicon
Download the Apple Silicon version of your local development tool if you’re on modern hardware.
This ensures the software runs natively rather than through Rosetta 2 translation, which saves battery life and improves speed.
Step 2: Grant Administrative Permissions
After you drag the app to your Applications folder, launch it.
Mac will prompt you for your administrative password several times during the first site setup. This happens because the app needs to modify the system’s /etc/hosts file and install a local SSL certificate in your Keychain.
Without these permissions, your local site will show a “Privacy Error” in Chrome or Safari.
Step 3: Complete the Site Setup
Follow the same site creation process as Windows users.
Choose your preferred or custom environment and let LocalWP handle the installation.
Configuring Your Local WordPress Site for Success
Once the installation finishes, you’ll see a dashboard with your site details.
Don’t just click “Admin” and start writing. You need to adjust a few professional settings first.
Enable One-Click Admin
In your local dashboard, there’s usually a toggle for “One-Click Admin.”
Set this to your user profile. It saves you from typing your password every time you want to access the dashboard.
Trust the SSL Certificate
Look for a “Trust” button next to the SSL section.
Clicking this tells your computer that the local certificate is safe. This allows you to use https:// locally. This proves vital because many modern WordPress features and third-party APIs require a secure connection to function.
Review the Database Structure
A professional should know what’s happening under the hood.
Most local tools include a database manager like Adminer or OpenAdmin. Open it and you’ll see the standard WordPress tables like wp_posts and wp_options.
Familiarizing yourself with these tables represents a prerequisite for more advanced tasks like Manual WordPress Installation via FTP when you eventually move to a live server.
Recommended Local WordPress Environment Settings
The following table shows the recommended configurations for a local environment in 2026:
| Component | Recommended Version | Reasoning |
|---|---|---|
| PHP | 8.3 or 8.4 | Better memory handling and execution speed. |
| Web Server | Nginx | Better performance for static asset delivery. |
| Database | MySQL 8.0+ | Industry standard for data integrity and speed. |
| WordPress | Latest Stable | Access to the newest Block Editor features and security patches. |
Troubleshooting Common Local WordPress Issues
Even the best tools fail sometimes.
Site Won’t Start: Antivirus Blocking
If your site won’t start, check your antivirus software.
Many aggressive security suites block the modification of the hosts file, which prevents the local URL from working. You may need to whitelist your development folder.
Maximum Execution Time Errors
Local environments sometimes have conservative PHP settings.
Locate your php.ini file through the local tool’s interface and increase the max_execution_time to 300. This prevents the site from timing out when you’re importing large amounts of demo content or running heavy migrations.
Review our guide on Fixing the Maximum Execution Time Exceeded Error for detailed solutions.
Changes Not Appearing
If you find that your changes aren’t appearing, disable any caching plugins.
You don’t need an object cache or a page cache on a local machine. These only add layers of complexity that make debugging harder.
Moving from Local WordPress to Live Server
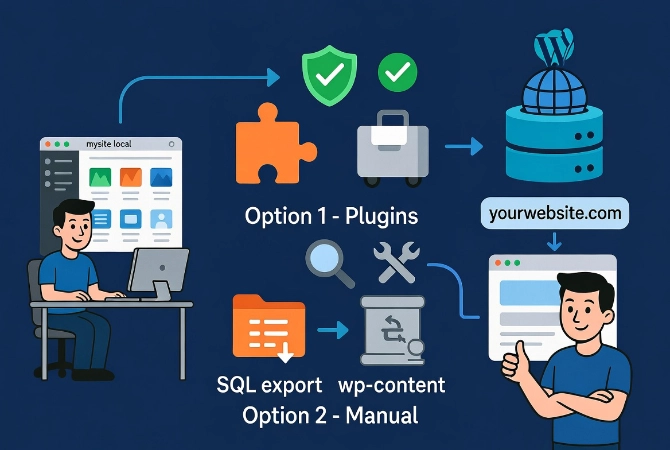
Eventually, your work is done and you need to show it to the world.
You have two main options for migration.
Option 1: Using Migration Plugins
You can use a plugin like WP Migrate or All-in-One WP Migration.
These tools handle the database search-and-replace for you. They change all instances of “mysite.local” to “yourwebsite.com” automatically. This represents the safest route for beginners.
Option 2: Manual Migration
The second option is a manual migration.
You export the database via SQL and zip up the wp-content folder. This method gives you total control but requires more care.
Regardless of the method, make sure you go through the 10 Essential Settings After Installing WordPress once the site is live. You need to re-verify your permalinks and search engine visibility settings.
The Professional WordPress Workflow
Local development isn’t just about having a playground.
It’s about creating a repeatable process. Most seasoned developers keep a “Blueprint” or a “Starter Site.” This is a pre-configured local install that already has their preferred theme, base plugins, and custom functions.
Creating WordPress Starter Sites
Instead of starting from scratch every time, you simply clone the blueprint.
This ensures every project starts with a high standard of configuration. According to Wikipedia’s entry on WordPress, the platform’s extensibility is its greatest strength, but that same extensibility can lead to bloat if not managed.
Local blueprints help you keep that bloat in check.
Using WP-CLI in Local Development
You can use WP-CLI in your local environment.
WP-CLI is a command-line interface that allows you to update plugins, regenerate thumbnails, or search-and-replace strings in the database without ever opening a browser. It’s significantly faster than using the GUI once you learn the basic commands.
Final Technical Considerations for Local WordPress
Keep your local environment clean and organized.
Delete sites you’re no longer working on. Each local site consumes disk space and can eventually slow down your machine if you have dozens of them running background processes.
Match Your PHP Versions
Keep your PHP versions updated and matched.
Running an old version of PHP locally while your live server uses a new one is a recipe for disaster. Code that works on PHP 7.4 might throw a fatal error on PHP 8.3.
Always match your local environment as closely as possible to your production environment. You can find detailed documentation on server requirements at PHP.net.
Eliminate Variables Between Environments
The goal is to eliminate variables completely.
When you know your local site is perfect, the migration to live becomes a routine task rather than a stressful event. Local development forms the foundation of a professional WordPress career. It gives you the freedom to experiment and the security to deliver high-quality work every time.
Frequently Asked Questions About Local WordPress Installation
Do I need to install WordPress locally?
Yes, for professional development. Local installation allows you to test changes, develop features, and troubleshoot issues without risking your live site. It’s faster, safer, and considered industry best practice.
Is LocalWP free to use?
Yes, LocalWP is completely free for unlimited sites. It offers premium add-ons for team collaboration and advanced features, but the core functionality costs nothing.
Can I run multiple local WordPress sites?
Yes, you can run as many local sites as your computer’s resources allow. Each site runs independently with its own database, PHP version, and configuration.
What’s the difference between localhost and a live server?
Localhost runs on your computer and is only accessible to you. A live server is connected to the internet and accessible to anyone. Localhost is for development and testing; live servers are for production.
How do I access my local WordPress site?
LocalWP provides a custom URL (like mysite.local) that only works on your computer. Click the “Open Site” button in LocalWP or type the URL directly into your browser.
Can I use the same plugins locally and on live?
Yes, plugins work identically in both environments. However, avoid using caching or security plugins locally as they add unnecessary complexity during development.
Additional Resources for WordPress Development
Continue building your WordPress development expertise with these essential guides:
- Master the complete process in WordPress Basics and Installation
- Configure your site using 10 Essential Settings After Installing WordPress
- Deploy manually with Manual WordPress Installation via FTP
- Fix server errors using Fixing the Maximum Execution Time Exceeded Error
- Choose quality infrastructure with How to Choose the Best WordPress Hosting
Local development represents the foundation of professional WordPress work. It gives you the freedom to experiment and the security to deliver high-quality work every time. By installing WordPress locally on Windows or Mac, you create a safe testing environment that mirrors your production server. This eliminates the risk of breaking live sites and allows you to develop faster, test thoroughly, and deploy confidently. Return to WordPress Basics and Installation whenever you need to review the foundational concepts that make professional WordPress site management possible.