I deleted three hours of work because I couldn’t figure out which block was selected in a nested layout. I kept clicking the wrong element, changing settings I didn’t mean to touch. One accidental keystroke wiped the entire column structure because I didn’t know the List View existed.
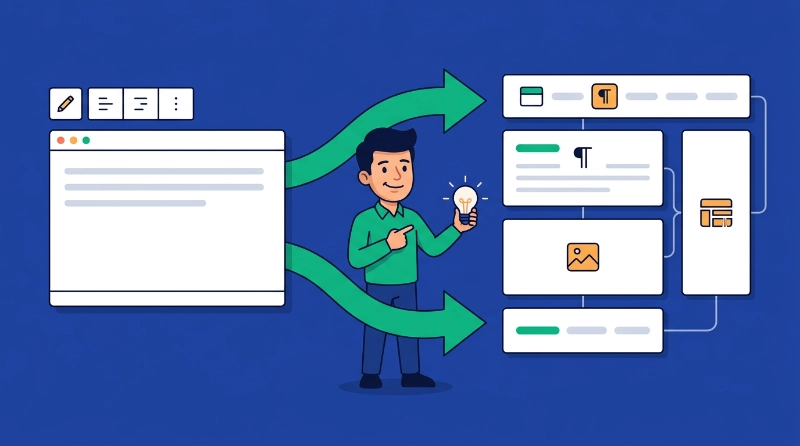
The WordPress editor has changed dramatically. It’s no longer a simple text window. Today, the Gutenberg editor functions as a comprehensive layout engine that uses a modular approach to web design. If you’re still thinking in terms of document processing, you’re behind because every piece of content is now an independent unit called a block. This shift allows for precision that the old Classic Editor could never provide. Before you begin your first post, ensure you have a solid foundation by visiting our guide on WordPress Basics and Installation. Understanding the backend environment helps you appreciate how the Gutenberg editor interacts with your database.
The Evolution of the Gutenberg Block Editor
The adoption of Gutenberg wasn’t immediate when it launched in 2018.
The community was divided. Many users preferred the simplicity of the TinyMCE interface. However, the move toward a block-based system proved necessary for the platform to remain competitive.
You can read more about this transition on the Wikipedia WordPress history page.
By 2026, the editor has matured into a stable, high-performance tool that forms the core of Full Site Editing (FSE). It allows you to control headers, footers, and sidebars without writing a single line of PHP.
Understanding the Block-Based Philosophy
Everything in Gutenberg is a block.
A paragraph is a block. An image is a block. Even a spacer or a custom piece of HTML is a block. This structure is data-driven because each block stores as a JSON object within the post content.
Why Blocks Matter for Your WordPress Site
This means the data is portable.
You can move blocks between different sites and they retain their structural integrity. You’re building a data structure, not just writing a story.
This modularity is why choosing the right platform matters. If you’re still deciding between hosted and self-hosted options, check out our analysis of WordPress.com vs WordPress.org: Which One to Choose?.
Performance Benefits of Block-Based Design
Your choice of hosting affects how fast these blocks render on the front end.
Block-based content is inherently more efficient because it produces less code bloat than third-party page builders. Recent industry data shows that block-based themes can improve Core Web Vitals scores by up to 35 percent compared to older, script-heavy themes.
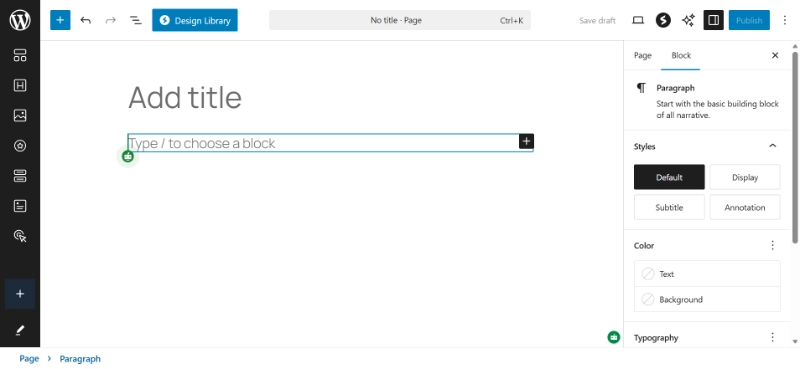
The Gutenberg Editor Interface Anatomy
The interface divides into three primary zones.
You must learn these to work efficiently.
Zone 1: The Top Toolbar
This contains the block inserter (the plus icon), the tool selector, and the undo/redo buttons.
It also holds the “List View,” which is the most important tool for complex layouts. The List View shows you a tree structure of every block on your page. Use it because it prevents clicking errors in nested layouts.
Zone 2: The Content Canvas
This is the central area where you build your page.
It tries to mimic the look of your live site, but it’s not a perfect 1:1 preview. Always use the “Preview” button to see the final CSS rendering.
Zone 3: The Settings Sidebar
This sidebar changes depending on what block you have selected.
It offers two tabs: Post and Block. The Post tab handles metadata like categories, tags, and featured images. The Block tab handles specific styling for your selected element.
Learn more about post creation in our guide on How to Create Your First WordPress Post.
How to Insert and Manage Blocks in Gutenberg

Adding a block is simple.
You click the plus icon or type a forward slash followed by the block name. For example, typing “/image” instantly brings up the image block. This is a fast way to work.
Professionals use keyboard shortcuts to maintain their flow.
Moving and Organizing Blocks
Once a block is on the page, you can move it using the drag handle or the up and down arrows in the block toolbar.
But don’t just stack blocks vertically. Use the Group block and the Column block to create advanced layouts.
Using Group Blocks for Layout Control
The Group block allows you to wrap multiple elements together.
This proves helpful for applying a background color to a whole section. The Columns block allows for responsive side-by-side content. You can set the width of each column individually.
So if you want a narrow sidebar and a wide content area, you can do that easily.
Advanced Design with Gutenberg Block Patterns
Patterns are pre-designed layouts that combine multiple blocks together.
Instead of building a “Contact Us” section from scratch, you can insert a pattern. WordPress comes with a directory of these, but you can also create your own.
Synced vs. Unsynced Patterns
This is where the power of 2026 WordPress truly lies.
Patterns can be “Synced” or “Unsynced.” A Synced Pattern (formerly called Reusable Blocks) is powerful because if you change it in one place, it updates everywhere on your site.
This proves perfect for call-to-action buttons or newsletter sign-up forms.
An Unsynced Pattern is a starting point. Once you insert it, you can change the text or images without affecting other instances of that pattern. This saves hours of manual work and ensures consistency across your entire project.
The Query Loop Block for Dynamic Content
The Query Loop is the most technical block available to beginners.
It replaces the old “Recent Posts” widgets. It allows you to display a list of posts or pages based on specific criteria. You can filter by category, author, or keyword. You can even choose the layout (grid or list).
Creating Dynamic Homepages with Query Loop
For a beginner, this might seem complex.
But it’s the key to creating dynamic homepages. It pulls content directly from your database and formats it according to your design. It does this without needing a developer.
Accessibility Standards in the Gutenberg Editor
Accessibility isn’t an afterthought anymore.
It’s a legal and ethical requirement. Gutenberg makes this easier because every image block has a field for Alt Text. Use it. Describe the image for screen readers.
Color Contrast Warnings
The editor also warns you if your color contrast is too low.
If your text is hard to read against a background, the sidebar shows a notification. Following these prompts helps you meet W3C Accessibility Guidelines.
Performance Best Practices for Gutenberg
Performance represents another critical factor.
Avoid “Block Nesting” deep into 10 or 15 levels. Each level of nesting adds a new HTML div to your page. Too many divs can slow down the browser rendering process.
Keeping Block Structures Lean
Keep your structures lean and simple.
Use the “Group” block only when necessary for styling or logical organization. Always optimize your images before uploading them to the block editor.
Gutenberg can resize images, but it cannot fix a 10MB file size issue.
Essential Gutenberg Editor Keyboard Shortcuts
| Action | Shortcut (Mac) | Shortcut (Windows) |
|---|---|---|
| Open Block Inserter | Shift + Option + T | Shift + Alt + T |
| Show/Hide Sidebar | Command + Shift + , | Ctrl + Shift + , |
| Open List View | Control + Option + O | Shift + Alt + O |
| Duplicate Selected Block | Command + Shift + D | Ctrl + Shift + D |
The Role of Global Styles in Gutenberg
In the past, you had to change fonts and colors in a CSS file or a theme customizer.
Now, you use Global Styles within the site editor. This allows you to set the default look for every block. If you want all paragraph blocks to have a 1.5 line height, you set it once.
Applying Site-Wide Design Changes
This change applies site-wide and ensures a professional, cohesive brand identity.
You can find this by clicking the half-circle icon (Styles) in the top right corner when using a block-based theme. It’s a powerful way to manage design without repeating yourself.
Common Pitfalls for Gutenberg Beginners
The most common mistake is ignoring the List View.
Without it, you’ll struggle to select the parent “Columns” block when you want to change the layout. You’ll keep clicking the individual “Column” or the “Paragraph” inside it.
Open the List View and Leave It Open
It’s a map of your document that prevents countless frustrations.
Avoid Over-Reliance on Third-Party Block Plugins
Another mistake is over-reliance on third-party block plugins.
While some add great features, every plugin adds code to your site. WordPress core blocks can handle 90 percent of layout needs. Before installing a plugin for a “Price Table,” try to build one using columns, buttons, and borders.
You’ll end up with a faster site and less technical debt.
Learn to Edit Blocks as HTML
Finally, remember that Gutenberg is a visual tool, but it generates HTML.
If something looks broken, you can always click the three dots in the block toolbar and select “Edit as HTML.” This allows you to see the underlying code. It’s a great way to learn how the editor works under the hood.
Most beginners are afraid of this view. Don’t be because it’s the most precise way to troubleshoot layout issues.
Frequently Asked Questions About the Gutenberg Editor
What is the Gutenberg editor in WordPress?
Gutenberg is WordPress’s block-based editor introduced in 2018. It treats every content element (paragraphs, images, videos) as independent blocks that you can arrange, style, and reuse. It replaced the old TinyMCE Classic Editor.
How do I add a new block in Gutenberg?
Click the plus (+) icon in the top toolbar or within the content area. Alternatively, type a forward slash (/) followed by the block name (like “/image” or “/heading”) for faster insertion.
What’s the difference between Synced and Unsynced patterns?
Synced patterns (formerly Reusable Blocks) update everywhere when you edit one instance, perfect for repeated elements like CTAs. Unsynced patterns are starting templates that you can customize independently without affecting other instances.
How do I select nested blocks in Gutenberg?
Use the List View (Shift + Alt + O on Windows, Control + Option + O on Mac). It shows a tree structure of all blocks, making it easy to select parent containers, columns, or deeply nested elements.
Can I still use the Classic Editor instead of Gutenberg?
Yes, install the “Classic Editor” plugin from WordPress.org. However, Gutenberg offers superior layout control, accessibility features, and performance. Learning Gutenberg is recommended for modern WordPress development.
How do I create columns in the Gutenberg editor?
Click the plus icon, search for “Columns,” select your desired column layout (2, 3, or custom), then add content blocks within each column. You can adjust individual column widths in the block settings sidebar.
Additional Resources for Gutenberg Mastery
Continue building your Gutenberg expertise with these essential guides:
- Master the foundation in WordPress Basics and Installation
- Compare platforms with WordPress.com vs WordPress.org: Which One to Choose?
- Create content using How to Create Your First WordPress Post
- Build pages through How to Create a New Page in WordPress
Mastering this editor takes time because it’s a professional tool. But once you understand the block logic, you can build almost anything. You’re no longer limited by the constraints of a text box because you’re a layout designer. Keep practicing with different block combinations and experiment with patterns and Global Styles. The future of web publishing is modular, and Gutenberg is the vehicle that gets you there. Return to WordPress Basics and Installation whenever you need to review the foundational concepts that make professional WordPress site management possible.