How to Create and Publish Your First WordPress Post
I stared at the blank WordPress editor for 45 minutes on my first attempt, terrified to click anything. I didn’t know what blocks were, where categories went, or why my title looked different than my URL. That paralysis wasted an hour I’ll never get back.
Building a presence on the web starts with a single entry. You’ve already handled your WordPress basics and installation. Now you need to publish content. The process is straightforward, but doing it correctly requires attention to detail. In 2026, the WordPress block editor has matured into a powerful tool for structured data and semantic layout. Understanding how to create your first WordPress post represents more than just typing words into a box; it’s learning a canvas for your brand. This guide walks you through the precise steps to move from a blank screen to a live, indexed post.
The editor interface can vary with the WordPress version, theme, plugins, and user permissions, but the publishing workflow is consistent: draft the content, structure it with real headings, add accessible media, set the post metadata, preview it, and publish only after checking the public result. Categories and tags should help readers navigate rather than repeat every keyword.
Practical checklist
- Use one descriptive H1 supplied by the post title and organize sections with H2 and H3 headings.
- Write alternative text for informative images; leave it empty for purely decorative images.
- Preview desktop and mobile layouts and verify every link before publishing.
⚡ Quick Summary (TL;DR)
- Learning how to create your first WordPress post allows you to build a strong digital presence by turning the blank block editor into a professional canvas.
- Using a clear hierarchy with proper headings and optimizing your images with descriptive alt text ensures your content is accessible and ranks well.
- Organizing your posts with clear categories, specific tags, and custom excerpts keeps your website neat and encourages visitors to click through.
- Always use the preview tool to check your post on mobile devices, test your links, and verify the permalink slug before hitting publish.
Accessing the WordPress Post Editor
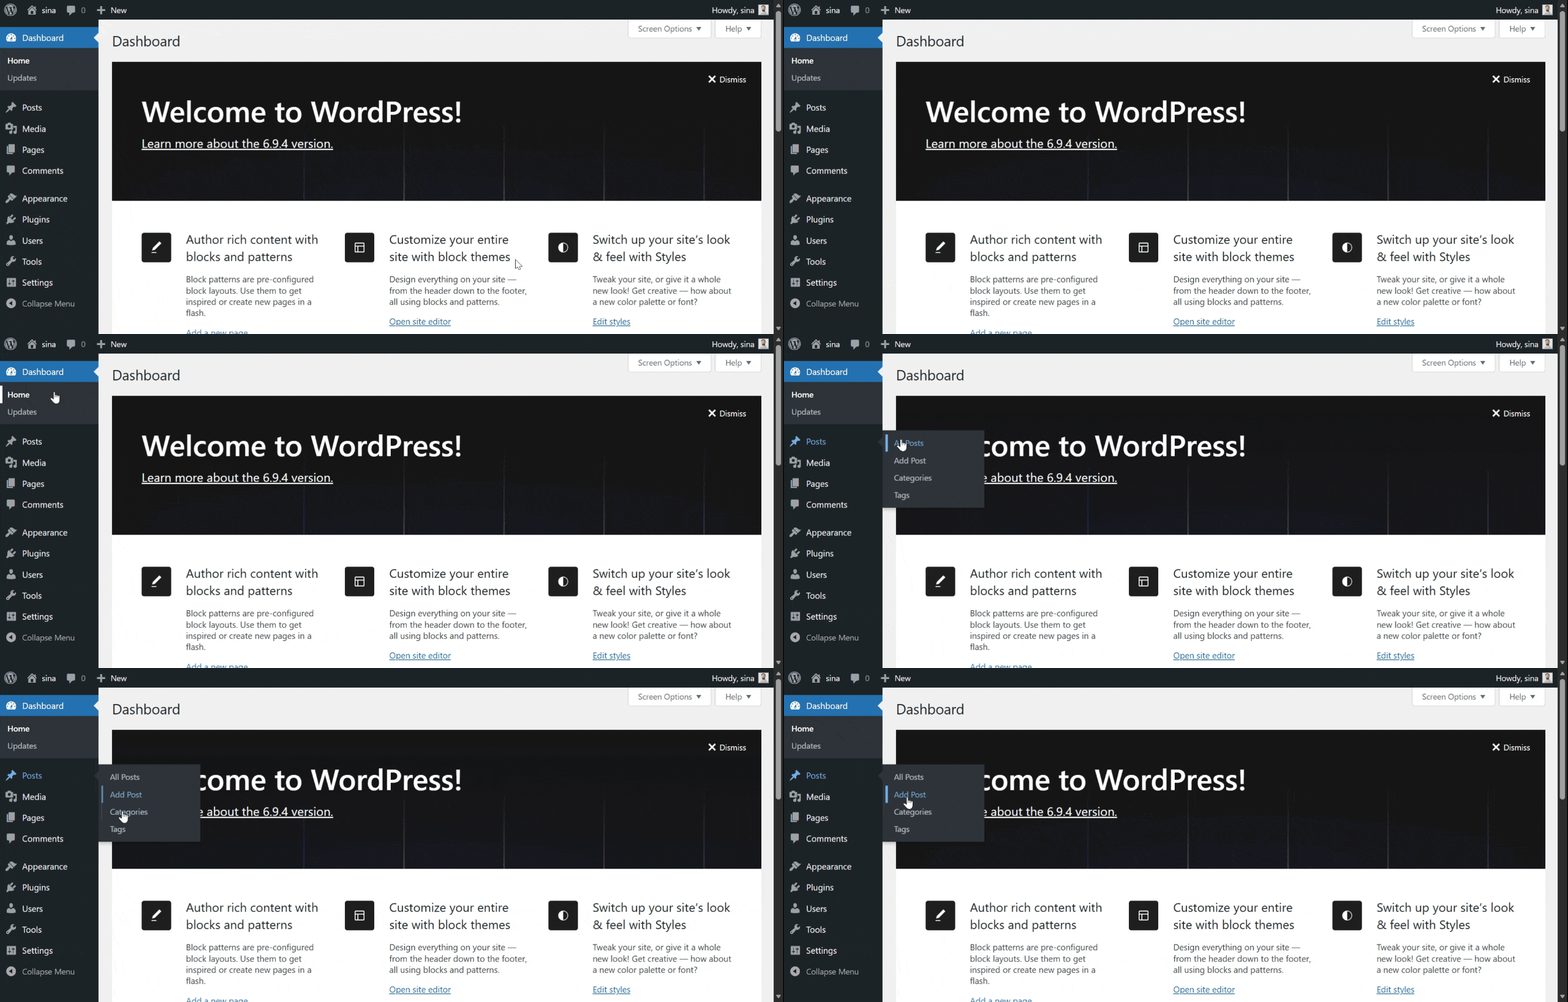
Your journey begins in the WordPress admin dashboard.
Look at the left-hand navigation menu and find the tab labeled Posts. Hover over it and a submenu appears. Click “Add New” to open the Block Editor, often referred to as Gutenberg.
The interface is clean by design because it hides complex settings until you need them. Focus on the center of the screen first.
Understanding the WordPress Post Title Field
The first element you see is the title field.
This isn’t just a heading; it becomes your H1 tag and usually generates your URL slug. Choose your words with care because accuracy matters more than clickbait in the modern search landscape.
Once you type your title, press Enter. WordPress automatically creates your first paragraph block.
The Anatomy of a WordPress Block
WordPress treats every element as an independent unit.
A paragraph is a block. An image is a block. Even a spacer is a block. This modularity is why WordPress remains the leader in content management.
According to data from Wikipedia, WordPress powers over 40 percent of all websites. That dominance stems from this flexible architecture.
Adding New Blocks to Your WordPress Post
To add a new element, click the plus icon.
It sits at the top left of the editor and appears within the content area as well. You can search for what you need by typing “image,” “heading,” or “list.”
Using Headings Correctly
For a standard post, stick to a logical flow.
Use headings to break up text. This helps both readers who skim and search engines understand your hierarchy. Use H2 tags for main sections and H3 tags for subsections.
Never skip levels. Moving from an H2 to an H4 creates a broken outline that confuses screen readers.
Adding Media and Visual Assets to WordPress Posts
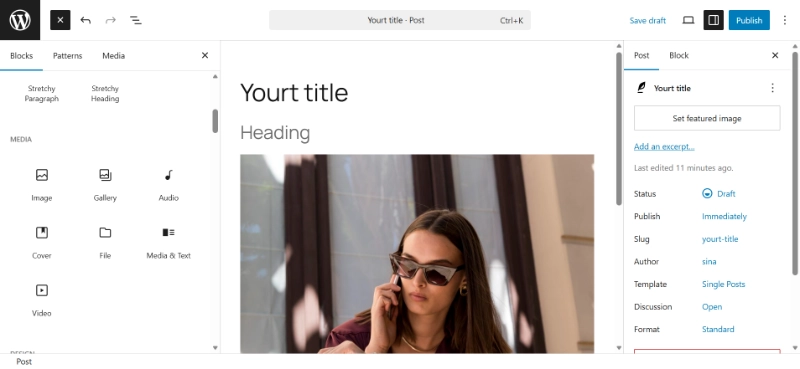
Visuals improve retention significantly.
But poorly managed images slow down your site. When you add an image block, you can upload a file or choose one from your library.
Always Add Alt Text to Images
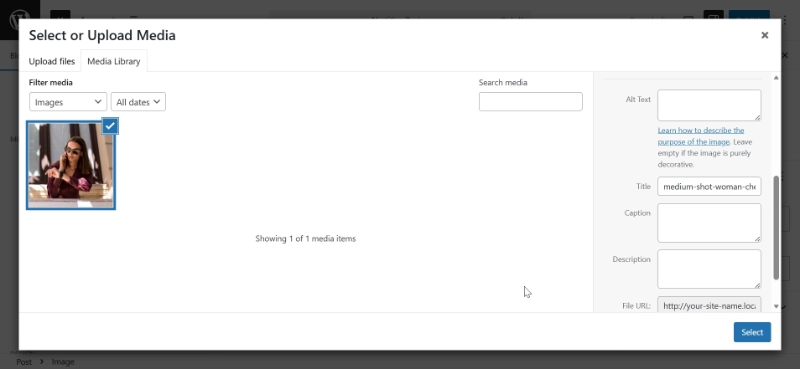
Always add alt text to every image.
This is a text description of the image that’s vital for accessibility and provides context to search engines. Be descriptive. If the image is a chart showing market growth, say exactly that.
Don’t just use keywords.
Optimizing Images for Performance
Performance is a ranking factor in 2026.
Core Web Vitals are stricter than ever. Before you upload, compress your files. Use WebP or AVIF formats for better efficiency.
WordPress handles some scaling, but you shouldn’t rely on the server to fix a 10MB file. Upload the correct dimensions. If your content area is 800 pixels wide, don’t upload a 4000-pixel-wide photo.
It wastes bandwidth and frustrates users on mobile connections.
WordPress Taxonomies: Categories and Tags
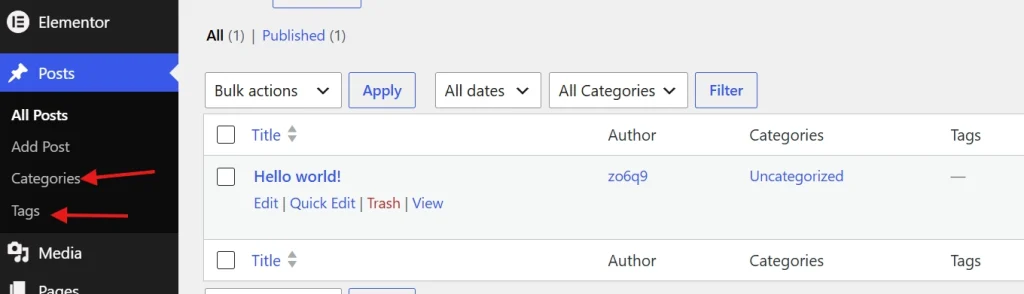
Organization is the backbone of a professional site.
Look at the right-hand sidebar. Under the Post tab, you’ll find Categories and Tags. Many beginners confuse the two.
Understanding WordPress Categories
Think of categories as the table of contents for your site.
They’re broad and hierarchical. You might have a category for News and another for Tutorials. Every post should have one primary category.
Learn more in our detailed guide on WordPress Posts vs Pages: Key Differences.
Understanding WordPress Tags
Tags are different from categories.
They’re the index at the back of the book. They’re specific and granular. If your post is about a specific software update, the category is Tutorials. The tags might be the software name and the version number.
Don’t overdo it. Using fifty tags doesn’t help SEO because it creates “thin content” pages that can actually hurt your rankings. Stick to three to five relevant tags.
Configuring WordPress Post Settings
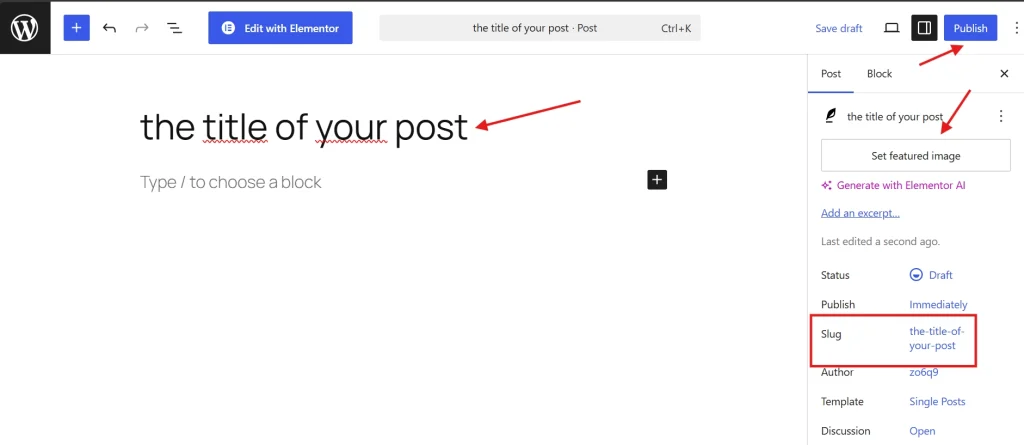
The sidebar contains several other critical settings.
Editing the WordPress Permalink Slug
The Permalink section allows you to edit the URL slug.
Keep it short. Remove “stop words” like “a,” “the,” or “and.” A slug like “create-first-post” is better than “how-to-create-your-very-first-wordpress-post-in-2026. “
It’s easier to share and cleaner for the eye. Review our complete guide on WordPress Permalinks: The Ultimate Guide for best practices.
Setting a Featured Image
The featured image is the thumbnail that appears on your homepage and social media.
It represents your post. Ensure it’s high quality and relevant.
Writing a Custom Excerpt
Below the featured image, you’ll find the Excerpt field.
This is a brief summary of your post. If you leave it blank, WordPress grabs the first few sentences of your content, which often looks messy.
Write a custom excerpt. Make it a concise summary that encourages a click. Think of it as your meta description and your sales pitch in search results.
Managing Comment Settings
Check the Discussion tab to decide if people can comment.
For your first post, you might want feedback. But comments require moderation. If you’re not ready to manage spam, turn it off.
You can always change this later. Consistency in your workflow prevents technical debt as your site grows.
Legal and Ethical Standards for WordPress Content
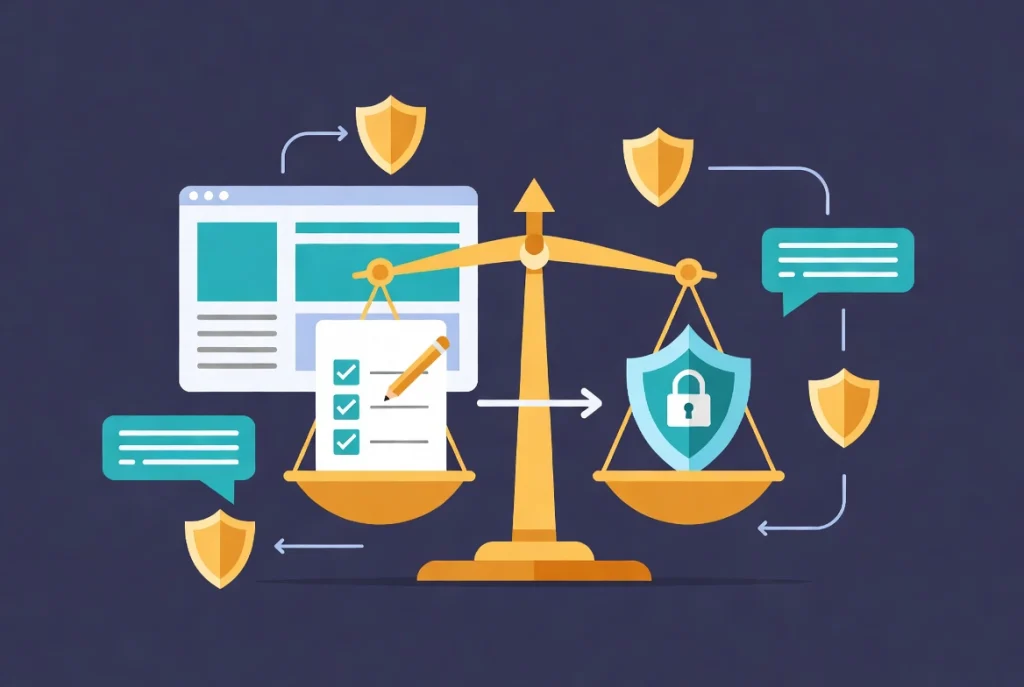
As a professional, you must respect intellectual property.
Never copy and paste text from other sites. Plagiarism is easily detected and can lead to legal action or search engine de-indexing.
Using Images Legally
This applies to images too.
Only use photos you own or those with a Creative Commons license. For more on legal usage, consult the Cornell University Library guidelines on copyright.
Professionalism is built on original thought and proper attribution.
Ensuring Content Accuracy
Accuracy is your primary currency.
Verify your facts. If you cite data, link to the source. This builds trust with your audience because readers return to sources they trust and ignore those that provide generic or incorrect information.
Reviewing and Publishing Your WordPress Post
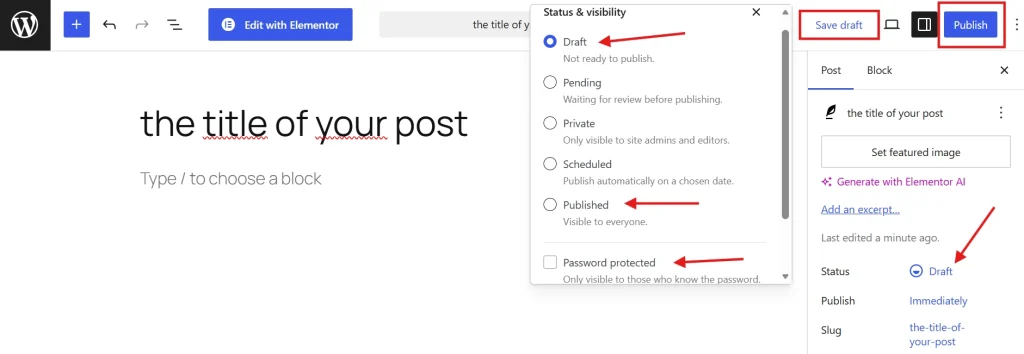
Before you hit the blue publish button, use the Preview function.
Look at your post on desktop and mobile. Sometimes a layout that looks good on a large monitor fails on a phone.
Pre-Publishing Checklist
Look for “widows” (single words on a new line) or awkward image placements.
Check your links. Click every single one to ensure they go where they should. Broken links signal a lack of care.
WordPress Visibility Options
WordPress gives you three options for visibility:
- Public: Everyone can see it
- Private: Only logged-in editors can see it
- Password Protected: Limits access to those with a code
Scheduling WordPress Posts
You can also schedule your post.
If your audience is most active at 9:00 AM on Tuesdays, write it on Sunday and schedule it. This allows you to maintain consistent output without being tied to your desk.
Consistency is the primary driver of growth in digital publishing.
Post-Publication WordPress Workflow
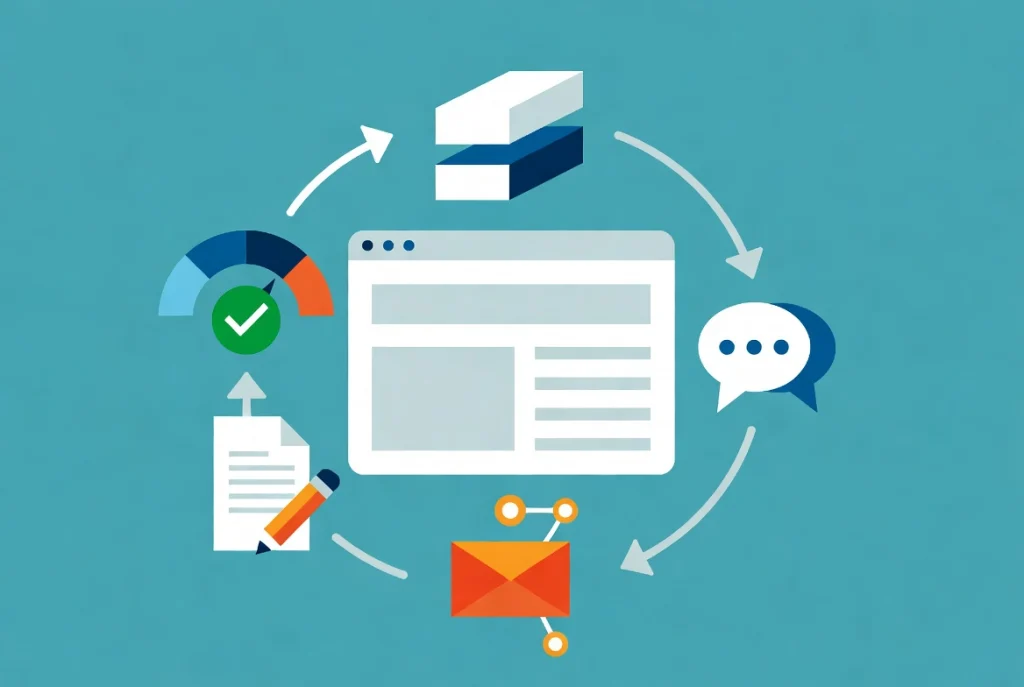
The work doesn’t stop when the post goes live.
Look at the post on your live site and check the loading speed. Read the text one more time because you’ll likely find a typo you missed in the editor. Fix it immediately.
Promoting Your WordPress Post
Then share the post.
Use your professional networks. Email your subscribers. Direct traffic to the new content to signal its relevance to search engines.
Engaging with Readers
Monitor the comments if you enabled them.
Engage with your readers. Answer questions. This builds a community because a blog is a two-way street. It’s a conversation between you and your industry.
Over time, these posts form a repository of your expertise. Treat each one as a brick in your professional foundation.
Technical Considerations for WordPress Posts in 2026
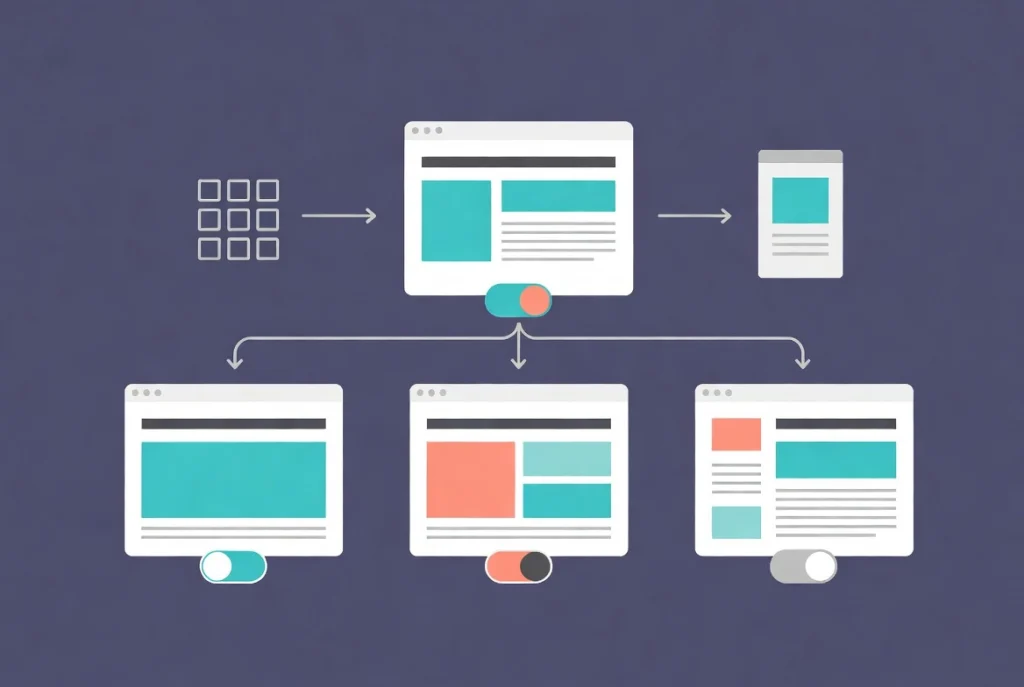
Modern WordPress installations often use full site editing.
This means your global theme patterns might influence your post layout. If the post looks different than expected, check your template settings in the sidebar.
Choosing the Right Post Template
You can often choose between a “Default” template, a “Full Width” template, or a “No Sidebar” template.
Choose the one that best fits the content type. Long-form guides usually benefit from a clean, distraction-free layout. News updates might work better with a sidebar showing recent posts.
WordPress Post Best Practices Summary
| Action | Benefit | Impact |
|---|---|---|
| Custom Slug | Cleaner URLs | Improved SEO |
| Alt Text | Accessibility | Inclusivity |
| Internal Links | Site Structure | Lower Bounce Rate |
| Scheduling | Consistency | Audience Trust |
Additional Resources for WordPress Content Creation
Continue building your WordPress content expertise with these essential guides:
- Master the complete process in WordPress Basics and Installation
- Understand content types with WordPress Posts vs. Pages: Key Differences
- Optimize URLs using WordPress Permalinks: The Ultimate Guide
- Navigate efficiently through Navigating the WordPress Dashboard: A Tour
Creating your first post is a milestone. It marks your transition from a consumer to a creator. The process becomes faster with practice because soon the technical steps will be second nature. You’ll focus entirely on the quality of your message, and that’s where the real value lies. Each post is a reflection of your professional standards. Use the tools WordPress provides, but bring your own insight because the technology is just a delivery vehicle for your ideas. Start with a solid plan, follow the structure, and publish with confidence. Return to WordPress Basics and Installation whenever you need to review the foundational concepts that make professional WordPress site management possible.