A client once insisted on a video background for their homepage hero. I warned them about performance. They insisted anyway, and I built it without proper compression. The finished section looked stunning in the editor. On the live site, the page took nine seconds to load on mobile. Visitors bounced before the video even started playing. We fixed it by compressing the file from 28MB down to 4MB and disabling video playback on mobile entirely. Load time dropped to under two seconds. The background still looked great on desktop. That project taught me everything worth knowing about video backgrounds in Elementor: preparation matters more than the Elementor settings themselves. This guide covers the complete process from asset preparation through the step-by-step Elementor setup and the advanced considerations that prevent the mistakes most designers make. If the Elementor interface is still new, the Getting Started with Elementor guide covers the foundation first. For the WordPress layer beneath everything here, the WordPress basics and installation guide is where that foundation starts.
Why Video Backgrounds Work and When They Do Not
A video background captures attention in a way that a static image rarely matches. It establishes mood instantly, communicates brand energy without requiring the visitor to read anything, and creates a visceral first impression that stays. Businesses in hospitality, technology, fitness, and creative industries use this technique effectively because it aligns with how those brands want visitors to feel immediately upon arrival.
The same technique fails when it is used purely for visual effect without strategic purpose. A slow-loading video background on a lead generation page costs conversions. Google’s research found that 53 percent of mobile site visits are abandoned when a page takes longer than three seconds to load. Large video files are one of the primary causes of exceeding that threshold. The visual appeal must serve the user experience, not compete with it.
Prepare Your Video Assets Before Opening Elementor
Asset preparation is the single most important step in this entire process. Elementor settings cannot compensate for a poorly optimized source file. Getting the video right before placing it in the editor saves significant troubleshooting time later.
Choose the Right File Format
MP4 with H.264 encoding offers broad compatibility across all devices and browsers, including older ones. WebM with VP9 encoding delivers smaller file sizes at comparable quality on modern browsers. Providing both formats covers maximum compatibility: modern browsers serve the WebM version, while older ones fall back to MP4. Upload both to the Elementor media library and assign them accordingly in the background settings.
Compress Aggressively
An uncompressed video file has no place on a production website. Tools like HandBrake or CloudConvert reduce file sizes dramatically without significant visible quality loss. The target for a background video loop is under 5MB for approximately 15 seconds of footage. Every megabyte beyond that adds measurable load time. Background videos do not need the same quality level as feature film content because they play behind text and overlays at reduced visual attention. Compress to the point where degradation becomes faintly visible, then stop one step before that point.
Design for Looping and Cropping
Background videos loop continuously, so the final frame must blend cleanly into the first frame. Any visible jump breaks the immersive effect immediately. Keep loops between ten and fifteen seconds. Longer loops increase file size without adding meaningful value in a background context. Design the video’s focal content toward the center of the frame, because responsive scaling crops the edges at narrower screen widths. Content placed near the edges on a 1920×1080 master file often disappears entirely on tablet and mobile viewports.
Step-by-Step: Adding a Video Background in Elementor
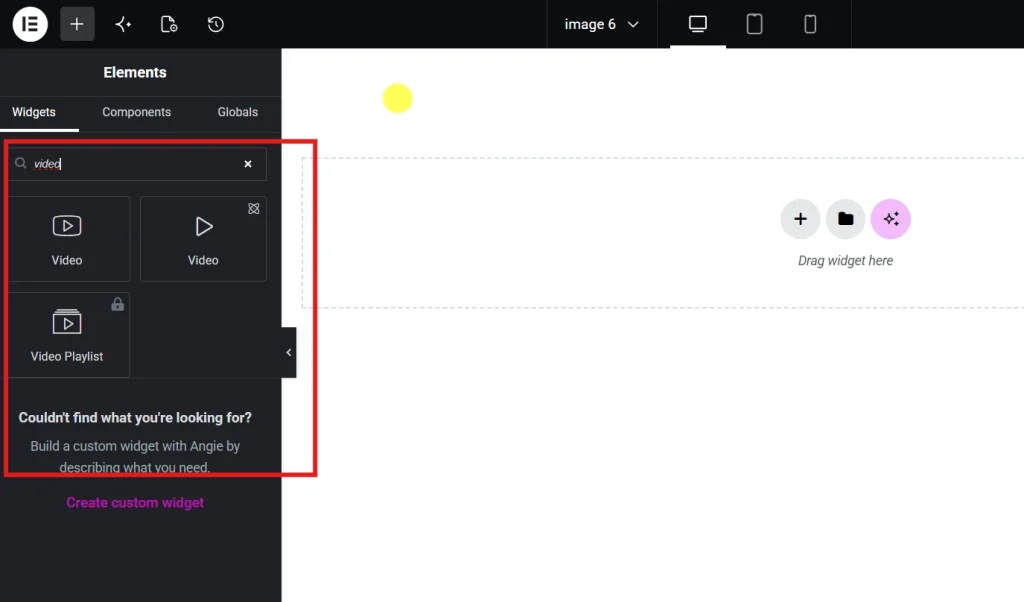
Open the Elementor editor and hover over the section that will receive the video background. Click the six-dot handle to select the entire section and open its editing panel on the left side. Navigate to the Style tab. Under the Background area, select the Video icon as the background type. The video settings panel appears below.
For self-hosted video, click Upload Video to open the media library. Upload the optimized MP4 file as the primary source and the WebM file as the secondary format for cross-browser compatibility. For external video from YouTube or Vimeo, paste the URL directly into the Video Link field. External sources introduce a dependency on a third-party server, which can affect load time and occasionally introduces unwanted branding elements from the platform. Self-hosted video gives more reliable control over both performance and appearance.

Critical Settings to Configure
Start Time and End Time define exactly which segment of the video plays. Use these to loop only the most visually relevant portion of longer source footage without re-editing the file. Play Once should remain off for continuous looping. Play on Mobile deserves careful consideration. Enabling it on mobile networks burns visitor data, slows page load, and often produces choppy playback on older devices. Leaving it disabled and relying on the fallback image is the correct default for most projects unless specific testing confirms mobile video performs acceptably.
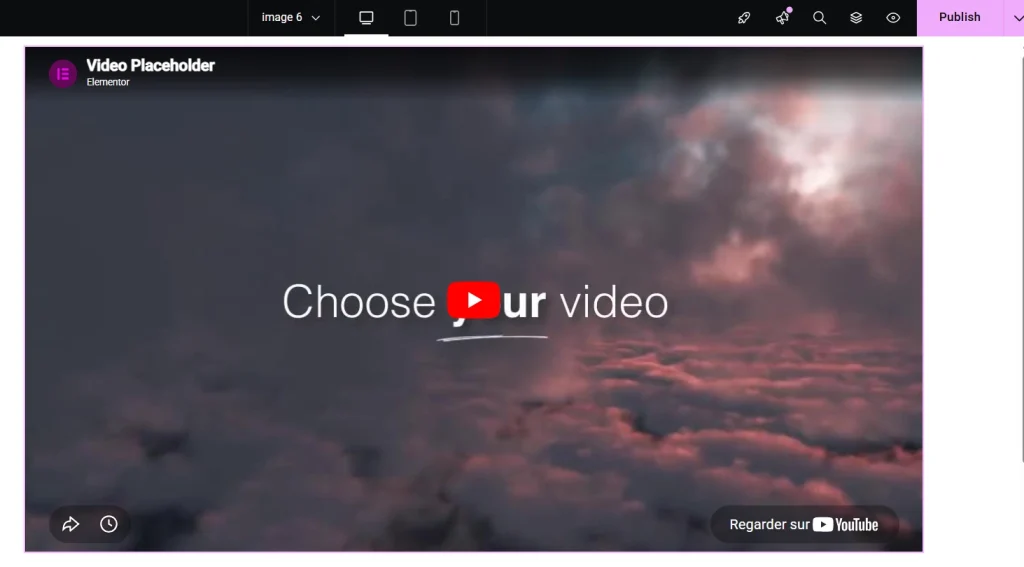
The Poster Image field is not optional. This static image displays whenever the video cannot load, when Play on Mobile is disabled, or when a user has restricted autoplay in their browser settings. A blank section where a video fails to load destroys credibility instantly. Upload a high-quality image that represents the section’s visual intent so the page looks intentional regardless of whether the video plays.
Adding an Overlay for Text Readability
Most video footage is too visually busy to place text directly over it without an overlay. Raw video backgrounds compete with every color shift and movement happening in the footage behind the content. An overlay places a semi-transparent color layer between the video and the page content, creating the separation that makes text readable without hiding the video entirely.
In the Style tab, the Background Overlay section sits directly below the main Background panel. Set the overlay type to Classic and choose a dark color for light text sections. An opacity between 0.3 and 0.5 preserves enough video visibility to justify using it while keeping text clean and readable. Higher opacity values make the overlay indistinguishable from a solid color background, at which point the video adds file size without adding visual value. For a full breakdown of overlay techniques including gradient overlays and blend modes, the guide on How to Add Background Images and Overlays in Elementor covers every option in detail.
Performance, Mobile, and Accessibility Checklist
| Consideration | Recommended Action |
|---|---|
| File size | Keep under 5MB for a 15-second loop |
| File formats | Provide both MP4 and WebM |
| Play on Mobile | Disable by default, test before enabling |
| Poster image | Always set, never leave blank |
| Motion sensitivity | Use slow, subtle footage only |
| Performance audit | Run Google PageSpeed Insights after publishing |
| Z-index conflicts | Adjust via the Advanced tab if elements stack incorrectly |
Run Google PageSpeed Insights immediately after publishing any page with a video background. Large video files appear as critical issues in the diagnostics panel with direct file size and load time data. If the score drops significantly after adding the video, compress the file further or reconsider whether the video is justified on that specific page. For broader best practices on keeping Elementor builds healthy and performant, the Elementor Best Practices for Beginners guide covers the full checklist.
Accessibility: Motion Sensitivity Matters
Some visitors experience discomfort or medical symptoms from fast-moving or flashing video backgrounds. WCAG guidelines address this directly under the guidelines for motion and animation. Using slow, subtle footage with minimal fast movement reduces the risk of triggering discomfort. Avoiding fast cuts, strobing effects, and rapid color shifts keeps the background accessible for the broadest possible audience. Providing the static poster image as a fallback also serves users who have configured their operating system or browser to reduce motion automatically.
Frequently Asked Questions About Video Backgrounds in Elementor
Should I use self-hosted video or a YouTube link for the background?
Self-hosted video gives more reliable control over load performance and appearance. YouTube embeds load an external script from Google’s servers, which adds a network dependency and can introduce YouTube branding or suggested video overlays in some configurations. For a polished, branded video background, uploading the file directly to the WordPress media library and providing both MP4 and WebM formats is the professional standard.
Why does the video background not play on mobile?
The Play on Mobile setting in Elementor defaults to disabled, which is the correct default for most projects. Many mobile browsers also block autoplay video with sound at the operating system level regardless of Elementor’s settings. Keeping Play on Mobile disabled and ensuring a high-quality poster image is set produces a better mobile experience than attempting to force video playback on devices and networks where it performs unreliably.
What causes a blank white area where the video background should appear?
A blank area usually means the video file failed to load and no poster image was set. Check that the video file uploaded successfully to the media library and that the file URL is correct in the background settings. Always set the Poster Image field so visitors see a styled static image even when the video fails to load for any reason.
How do I fix Z-index conflicts where content appears behind the video?
Z-index conflicts occur when overlapping elements have conflicting stacking order values. Open the Advanced tab of the affected widget or container and adjust the Z-index value. Increasing the Z-index of the content element above the value of the video background layer brings it to the front. If the issue persists, check whether a parent container has a Z-index or position property that is overriding the child element’s stacking context.
Additional Resources
- WordPress Basics and Installation: The Complete Beginner’s Guide
- Getting Started with Elementor in 2026: The Complete Guide
- How to Add Background Images and Overlays in Elementor
- Responsive Design Basics: Making Elementor Sites Mobile-Friendly
- Elementor Best Practices for Beginners
- Adding and Styling Images in Elementor
- How to Use Elementor Flexbox Containers: A Beginner’s Guide
- How to Build a High-Converting Landing Page with Elementor
- Google PageSpeed Insights Documentation
Final Thoughts: Prepare First, Place Second
The Elementor settings for a video background take about five minutes to configure. The asset preparation that makes those settings effective takes significantly longer, but it is where the real work happens. Compress the file below 5MB. Provide both MP4 and WebM formats. Set a poster image without exception. Disable mobile playback unless testing proves it is viable. Run a performance audit after publishing and fix what the data flags. Done in that order, a video background enhances the page. Done in reverse, it undermines everything else on it. If you need to revisit the WordPress foundation beneath all of this, the WordPress basics and installation guide is always the right place to start.