About eighteen months into freelancing, I started tracking how I was spending my time on client projects. The results were uncomfortable. Nearly 40 percent of every build was going toward recreating things I had already built before, hero sections, testimonial blocks, contact forms, pricing tables, each one taking just as long as the first time I ever built it. The work was not improving with repetition because I was not capturing anything. Every project started from zero, and every project paid for that cost.
Learning how to save and reuse Elementor templates was the single workflow change that had the biggest measurable impact on my output. Not a faster computer, not a new plugin, not a premium theme. Just the discipline of treating Elementor as a component library rather than a blank canvas, building once and deploying everywhere. This guide covers the full system from saving individual sections through managing a scalable template library and moving designs between sites. If the Elementor interface is still new territory, the Getting Started with Elementor guide is the right foundation to have in place first. For anyone newer to WordPress itself, the WordPress basics and installation guide is where to begin.
What Elementor Templates Actually Are Under the Hood
Elementor stores every saved template as an individual entry in the WordPress database under the elementor_library post type. When you save a section or a full page, the system generates a unique ID linked to a JSON packet containing every margin, color, font weight, animation setting, and widget configuration that was applied. That structure is precisely what makes exporting and importing between sites possible. You are not copying screenshots or transferring code manually. You are moving small, structured packets of design data between environments.
This backend logic becomes practically useful the moment something goes wrong after an import. A template that looks broken on a new site is almost always experiencing either a CSS conflict with the destination theme or a reference to a global font that has not been configured on the new site yet. The template carries its own settings, but it still lives within the global style ecosystem of wherever it lands. Following Elementor Best Practices for Beginners from the start keeps templates clean, portable, and free of the hard-coded dependencies that create these conflicts.
How to Save Individual Sections the Right Way
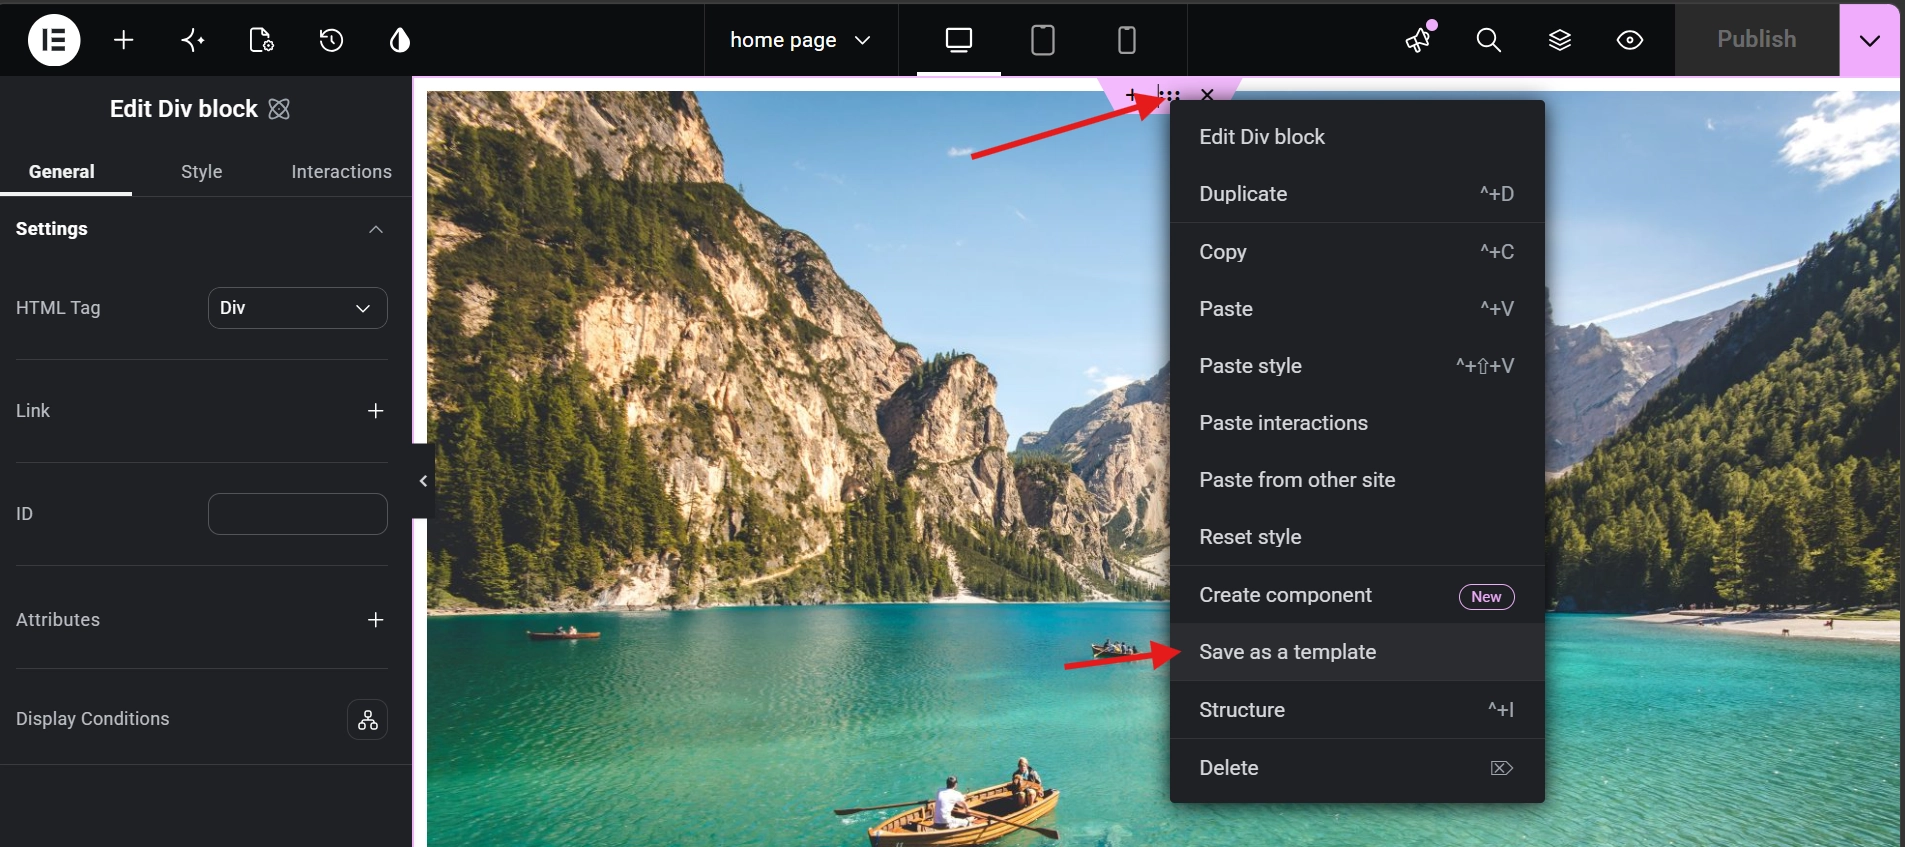
Most daily template-saving work happens at the section or container level. After spending two hours perfecting a hero area with entrance animations, background overlays, and precise typography, the instinct is to move on to the next task. The professional habit is to stop for thirty seconds first. Right-click the container handle at the top of the section, select Save as Template from the context menu, and a naming modal appears. What you type into that modal determines whether your library stays useful or becomes a graveyard of files called “Hero 1” and “New Section.”
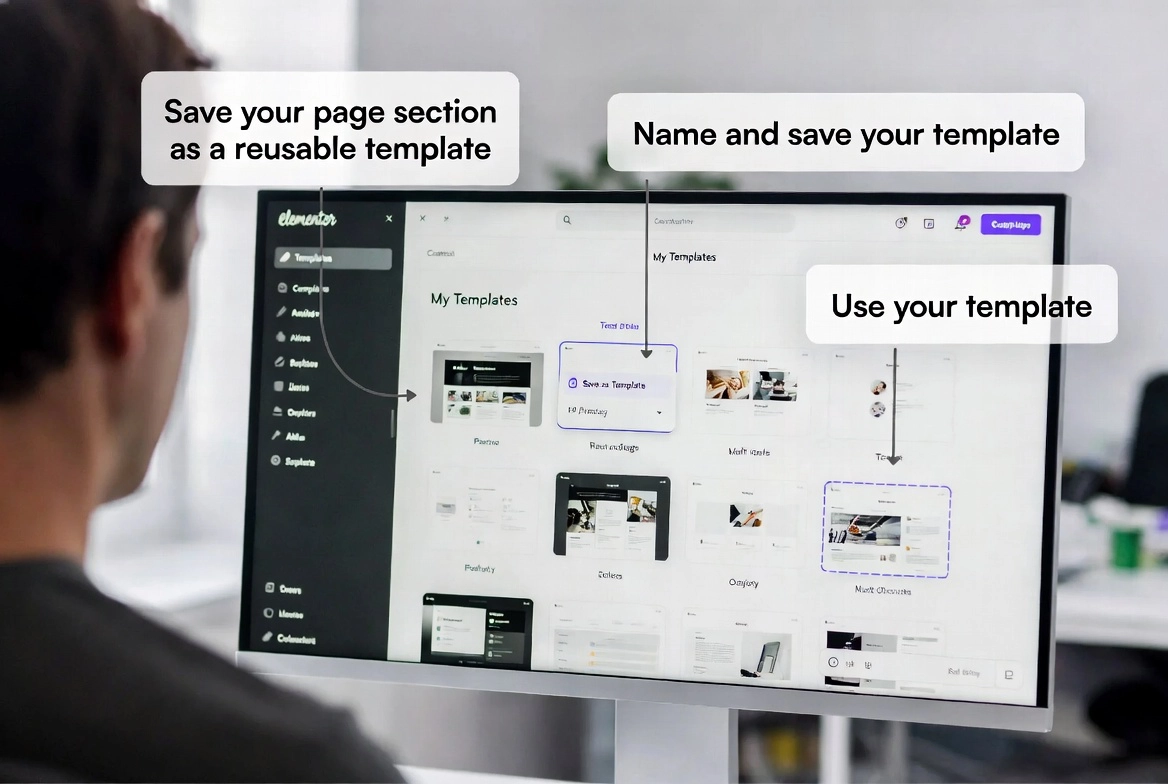
A tiered naming system like “Hero – Homepage – Dark Mode – V2” tells you immediately what the element is, where it was originally used, its visual variant, and its version number. When the library grows to a hundred assets, that specificity is what makes the search function actually useful rather than decorative. Once saved, the section appears in the My Templates tab inside the Elementor Library, ready for immediate use on any other page within the same site.
Pro Tip: Before saving any section as a template, switch to mobile view in the Elementor editor and verify the layout holds. A template saved with a broken mobile layout propagates that problem to every page it gets inserted into later.
Saving Full Page Layouts for Agency-Scale Repeatable Builds
Individual sections cover most daily needs, but full-page templates are what make agency-scale production genuinely fast. Service pages, landing pages, and legal pages that follow the same structural pattern across multiple clients are ideal candidates. Rather than saving each section individually, click the arrow next to the Update or Publish button at the bottom left of the Elementor panel and select Save as Template to capture the entire page layout in one action.
This captures everything between the header and footer, including page-level settings and any custom CSS applied in the page settings tab. For agencies building similar sites in the same industry, a base service page template means each new project starts with structure already in place and only the copy and images need to change. When contact forms are part of these page templates, the guide on Adding a Contact Form to Your Elementor Page covers how to manage those form assets cleanly within the template system.
The Template Library and Global Widgets: Knowing the Difference
The Saved Templates area in the WordPress dashboard, found under the Templates menu, is where every saved asset lives. Categories and tags are not optional once a library reaches any meaningful size. Without them, locating the right template among fifty entries becomes a search problem that slows down every project rather than speeding it up.
Global Widgets behave fundamentally differently from standard templates and the distinction matters in practice. When a widget is saved as Global, every instance of it across the entire site is linked to the same source. Changing the color of a Global CTA button on one page automatically updates every other placement of that button across the whole site. This makes Global Widgets the right tool for elements that must stay visually identical everywhere, like primary call-to-action buttons, announcement bars, or testimonial sliders. Standard templates are better suited for elements that serve as a starting point but may need to vary per page.
| Template Type | Best Use Case | Portability |
|---|---|---|
| Section / Container | Repeated UI elements like feature lists, FAQs, or hero areas | High, JSON export to any site |
| Full Page | Standardized layouts for service pages or landing pages | High, JSON export to any site |
| Global Widget | Elements that must stay identical everywhere such as CTAs | Low, site-specific only |
Exporting and Importing Templates Between Sites
Moving a template from a local development environment to a live production site requires no migration plugin. In the Saved Templates list, hovering over any template reveals an Export option that downloads the design as a .json file. On the destination site, the Import Templates button at the top of the Saved Templates area accepts that file and adds the template to the new site’s library immediately.
According to WordPress documentation, the platform’s extensibility is built on exactly this kind of modular data handling, keeping design assets independent of any specific database instance. One important caveat worth documenting for every template: if a template uses widgets from third-party plugins, those plugins must be installed on the destination site or the template will display a “Widget Not Found” error on import. Keeping a simple note of which plugins each template depends on prevents a frustrating debugging session on a new site.
Dynamic Templates and the Theme Builder: Build Once, Use Everywhere
The real ceiling of what templates can accomplish becomes visible when they are combined with the Theme Builder. Rather than saving static layouts for blog posts, the professional approach is to build a Single Post template that acts as a structural shell. Dynamic tags pull in the post title, featured image, and body content automatically for every post that matches the assigned template condition. Design the layout once and it applies to every existing and future post on the site without any additional work per post.
A headline font change that would previously require editing dozens of individual posts now takes a single edit to the template, with the update propagating everywhere immediately. This is the Build Once, Use Often philosophy operating at full capacity. When building these dynamic templates, ensuring they meet W3C accessibility standards from the start means every piece of content flowing through the template is accessible by default rather than requiring retrofits later.
Template Shortcodes: Placing Elementor Designs Outside the Editor
Every saved template in Elementor receives a unique shortcode visible in the Saved Templates list. Pasting that shortcode into a standard Gutenberg block, a sidebar widget, or any other area of WordPress that accepts shortcodes renders the full Elementor-designed template at that location. The practical application is specific and genuinely useful: a styled call-out box or a newsletter signup block built in Elementor can appear in the middle of a standard WordPress blog post without requiring the entire post to be built inside the Elementor editor.
Writers and editors keep their familiar WordPress text editing workflow while the shortcode injects the designed component exactly where it belongs. Design standards stay high across the site without requiring everyone on the team to operate inside Elementor for every piece of content they publish.
Keeping Your Template Library Clean and Maintainable
A library that grows without maintenance becomes a liability rather than an asset. Monthly cleanup is the professional standard. Old versions of templates that have been superseded should be deleted, because ten versions of the same header template in the same library adds clutter without adding value. Keeping only the current version of each component reduces database weight and makes every search faster and more reliable.
Third-party addon widgets deserve careful attention before saving any template that uses them. If the destination site does not have the same plugin installed, the import produces a “Widget Not Found” error that can be confusing to diagnose later. Sticking to native Elementor widgets for reusable template components wherever possible keeps templates maximally portable. For the full responsive checklist to run before saving anything to the library, the Responsive Design Basics guide covers every device breakpoint consideration in detail.
Frequently Asked Questions About Saving and Reusing Elementor Templates
Can I use a saved Elementor template on a different WordPress site?
Yes. Export the template as a .json file from the Saved Templates area and import it on the destination site using the Import Templates button. The design transfers completely including layout, widget settings, and styling. Any third-party plugin widgets used in the template must also be installed on the destination site, otherwise those specific widgets will show a “Widget Not Found” error after import while the rest of the template renders normally.
What is the difference between a Global Widget and a standard saved template?
A standard saved template is a reusable starting point. Inserting it and making changes only affects that specific instance while all other uses of the template remain unchanged. A Global Widget links every instance of it across the site to the same source, so editing the Global Widget updates every placement simultaneously. Global Widgets are the right choice for elements that must stay visually identical everywhere, like CTAs or announcement bars. Standard templates work better for components that serve as a starting point but vary per page.
Why does my imported template look different on the new site?
The most common cause is a global font or color setting that exists on the original site but has not been configured on the destination site. Templates carry their own widget-level settings but still reference the global style system of the site they live on. Configuring matching global fonts and colors on the destination site before importing templates prevents this problem in most cases. If the issue persists, check whether the destination theme is injecting conflicting CSS that overrides the template’s styles.
How do I insert an Elementor template inside a regular WordPress blog post?
Find the unique shortcode for the template in the Saved Templates list of the WordPress dashboard. Copy it and paste it into a Shortcode block inside the Gutenberg editor of the blog post. The Elementor-designed template renders at that position within the standard post content, letting writers work in the familiar WordPress editor while still including professionally designed Elementor components at specific points in the content.
How often should I clean my Elementor template library?
A monthly review is a reasonable standard for anyone actively building sites. Delete superseded versions, remove templates from completed projects unlikely to be reused, and consolidate similar templates into a single refined version. A lean, well-named library is significantly faster to work with than a large disorganized one, and keeping the database lighter contributes meaningfully to overall site performance over time.
Additional Resources
- WordPress Basics and Installation: The Complete Beginner’s Guide
- Getting Started with Elementor in 2026: The Complete Guide
- How to Use the Elementor Template Library
- Elementor Best Practices for Beginners
- Responsive Design Basics: Making Elementor Sites Mobile-Friendly
- Adding a Contact Form to Your Elementor Page
- Setting Up Global Colors and Fonts in Elementor
- Elementor Navigator: How to Manage Complex Layouts
- How to Preview and Publish Your Elementor Page
- WCAG Accessibility Standards: W3C
- WordPress: Wikipedia
Final Thoughts: Build a System, Not Just Pages
The shift from building individual pages to maintaining a system of reusable components is one of the most significant professional upgrades an Elementor user can make. Every section saved thoughtfully, every template named clearly, every library maintained consistently compounds into a workflow that gets faster and more reliable with every project rather than staying flat. The time invested in building the system pays back on every single build that follows it.
Save your best work. Name it precisely. Export it when moving between sites. Clean the library every month. These are not complicated habits, but they are the ones that separate designers who are always starting from scratch from those who are always building forward. If you need to revisit the WordPress foundation beneath all of this, the WordPress basics and installation guide is always there as a reliable starting point.