There is a specific kind of frustration that every Elementor user hits at some point. You are deep into a complex page build, trying to click a heading to edit it, and instead the container behind it keeps highlighting. Slower the second time, more deliberate, and still the wrong element. The heading is clearly visible on the canvas, but getting the mouse to actually land on it is another matter entirely. After ten minutes of this, most designers are ready to throw their monitor out the window.
The Elementor Navigator is the tool that ends that frustration permanently. It is also one of the most underused features in the entire platform, mostly because beginners do not need it right away and never develop the habit of reaching for it later. This guide covers how to use the Navigator to manage complex layouts with precision, speed, and the kind of clean DOM structure that keeps your pages fast. If you are still getting familiar with the Elementor interface itself, the Getting Started with Elementor guide is the right starting point before working through this.
Keep Your Designing Simple with the Elementor Navigator
When you’re building a massive web page with multiple custom sections, trying to select and move single layout elements can quickly become a headache. In this video, we’re taking a look at the Navigator tool—a handy little layout dashboard that lets you rename, drag, and reorder all your layout pieces from one clean side panel. It’s a huge workflow upgrade that saves an absolute ton of scrolling time while you’re designing.
What the Elementor Navigator Actually Is
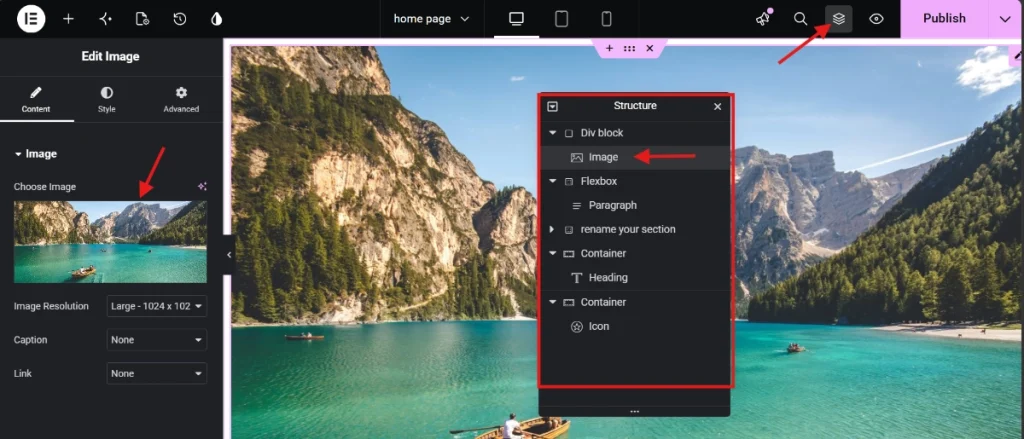
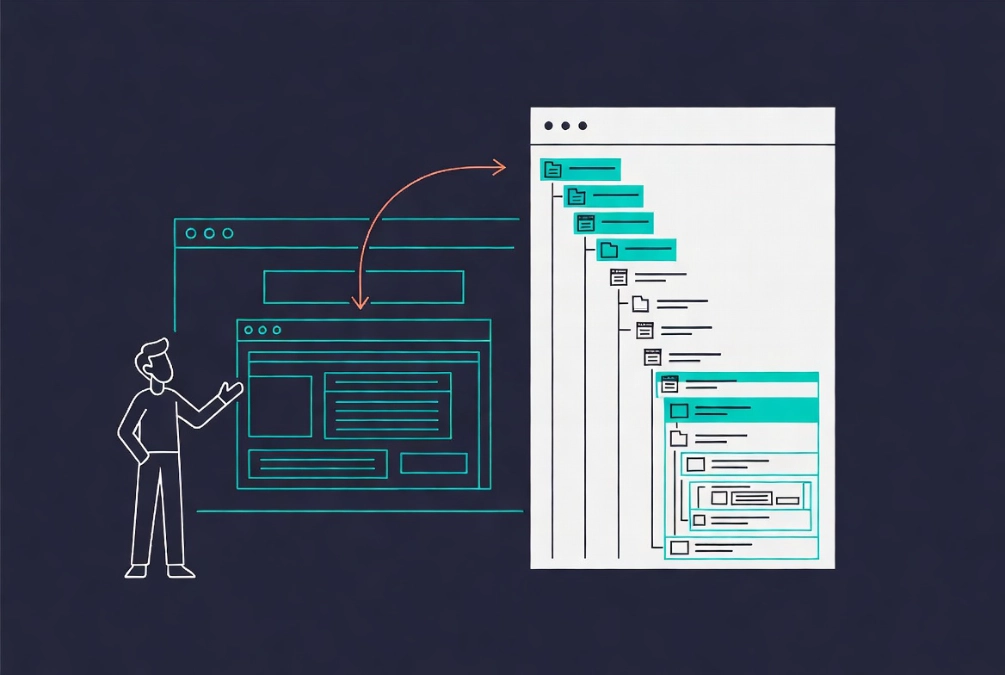
The Navigator is a tree-view representation of every element on your page, mirroring the Document Object Model that browsers use to render HTML. If you have used Adobe Photoshop or Figma, you will recognize it immediately as the layer panel equivalent for web layout. Rather than hunting through the visual canvas to find and select elements, the Navigator gives you a clean, text-based list of every section, container, widget, and column currently on the page, organized by hierarchy and indentation level.
Opening it takes two seconds. Click the Navigator icon in the bottom toolbar of the Elementor panel, or use the keyboard shortcut Cmd or Ctrl plus I. Most experienced Elementor users keep it docked open permanently so the page architecture is always visible alongside the canvas. For a full breakdown of where the Navigator and other tools sit within the editor, the Elementor Interface Tour: Understanding the Editor Panel covers the complete layout in detail.
Solving Z-Index and Overlapping Element Problems
Complex designs frequently involve layered elements where absolute positioning creates selection conflicts on the canvas. A hero section with a background image, a glassmorphism overlay, and floating decorative icons is a typical example. Once those decorative elements are absolutely positioned, clicking them on the canvas becomes nearly impossible because the parent container or a neighboring div occupies the same coordinate space and intercepts the click.
In the Navigator, none of that matters. You find the element in the list, click it, and the settings panel opens immediately. No hunting, no repeated clicking, no accidental selection of the wrong layer. This is also the correct way to manage z-index conflicts. Rather than guessing values and throwing z-index: 9999 at every overlapping problem, you can see exactly where an element sits in the stack order. Dragging it up or down in the Navigator list directly changes its position in the DOM, which is a far cleaner resolution than piling on increasingly large z-index values that eventually conflict with each other in unpredictable ways.
The Professional Habit of Renaming Everything
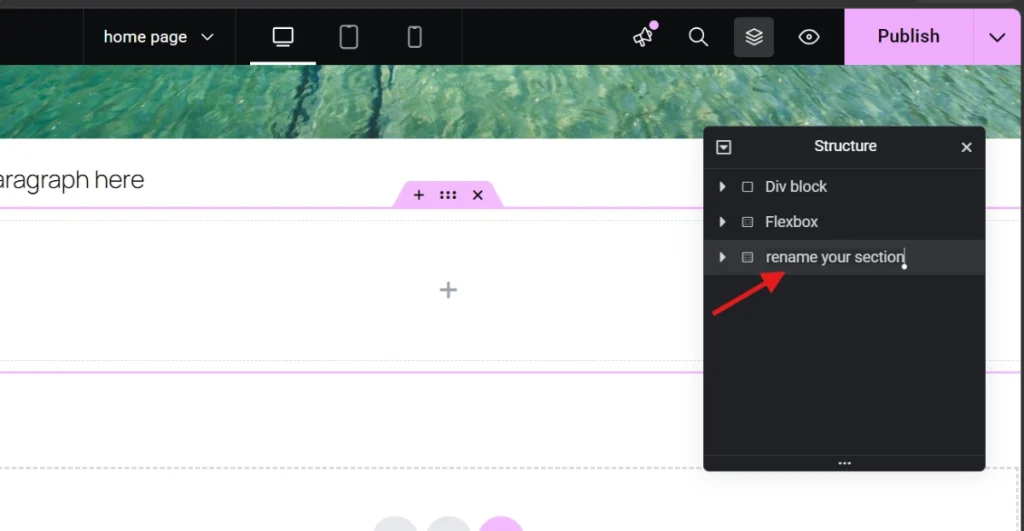
Open any Elementor page built by someone who has never used the Navigator intentionally and you will see the same pattern: “Container,” “Container,” “Heading,” “Text Editor,” “Container,” repeated across fifty items. Six months after the build, nobody, not the original designer, not a colleague, not the client, can tell which container holds the pricing table and which one holds the testimonial slider.
Renaming elements is the single habit that most separates maintainable professional builds from ones that are painful to revisit. Double-click any item in the Navigator to rename it. “Container” becomes “Service Grid Wrapper.” “Image” becomes “Founder Portrait.” Each rename takes about five seconds and pays back hours during revision phases or client handoffs. On long-form sales pages, descriptive names also make the Navigator’s search function genuinely useful, letting you jump directly to a named section rather than scrolling through the entire list.
Renaming has an accessibility benefit as well. Viewing your layout as a text-based hierarchy makes it much easier to spot heading level errors, H1 followed by H3 with no H2 in between, the kind of structural mistake that harms both screen reader navigation and SEO. The W3C heading structure standards make clear that a logical heading order is a fundamental accessibility requirement, and the Navigator makes these violations obvious in a way the visual canvas never does. When working on image-heavy layouts, properly named elements also make adding and styling images in Elementor faster because you can immediately identify which image belongs to which design block.
Reordering, Duplicating, and Pasting Styles Across Elements
Dragging elements on the canvas over a long page is imprecise and frustrating. Holding a mouse button while scrolling through 5,000 pixels of layout, trying not to drop the section in the wrong place, is a genuinely unreliable way to work. The Navigator removes that friction entirely. Collapse entire sections to reduce a long page to a short list of five or six top-level items, then drag the “Contact” section above the “Features” section with a tiny, controlled mouse movement. The result is accurate every time.
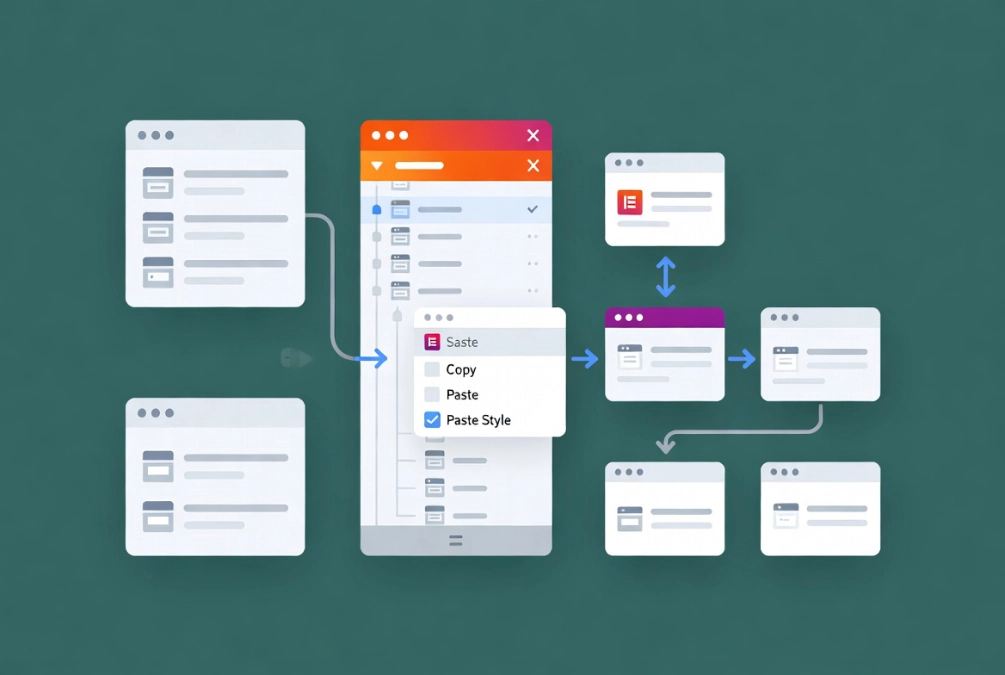
Right-clicking any element in the Navigator opens a context menu that includes Copy, Paste, and Paste Style options. If five containers all need the same padding and border-radius, style one correctly, then right-click and paste the style to each of the others. This enforces visual consistency across the layout in a fraction of the time manual styling would take, and it eliminates the subtle misalignments that make a page feel slightly off even when visitors cannot identify exactly why.
Managing Visibility While You Work
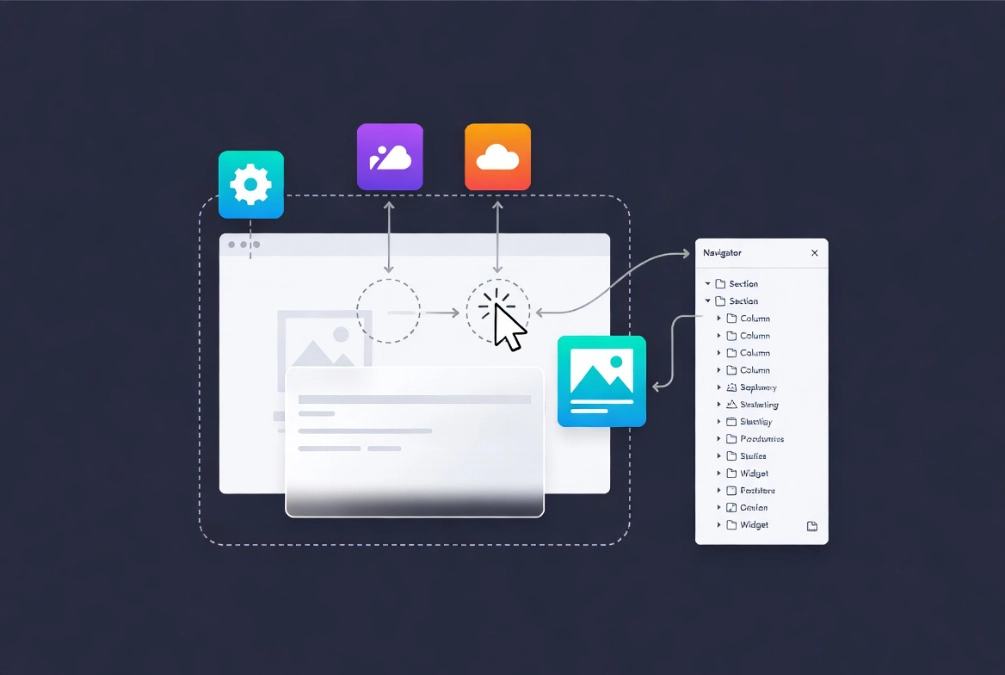
Every element in the Navigator has an eye icon beside its name. Clicking it hides that element from the editor view without removing it from the live site. This is purely a workspace tool, and it is invaluable on complex builds where overlapping elements interfere with editing the content underneath. A mega-menu that covers the header area while you are trying to adjust the logo, a sticky element that sits on top of everything, a decorative layer that obscures a text block you need to edit, all of these disappear instantly with one click on the eye icon.
For responsive design work, this visibility toggle is especially useful when you have desktop and mobile versions of a section coexisting on the same page. Hiding the mobile version while refining the desktop layout, then switching back, removes the visual confusion of seeing both versions stacked in the editor simultaneously. At a glance, you can also audit which elements are set to hide on specific breakpoints by their appearance in the Navigator list, saving repeated trips to the responsive bar to check individual element settings.
Navigator Best Practices at a Glance
| Action | Benefit | Pro Tip |
|---|---|---|
| Renaming Elements | Faster identification and easier client handoffs | Use a convention like [Section] – [Element Name] for consistency |
| Collapsing Sections | Easier reordering of long-form pages | Right-click and select Collapse All to see the macro structure instantly |
| Using the Eye Icon | Reduces workspace clutter without affecting the live site | Hide sticky or overlapping elements to edit content underneath cleanly |
| Right-Click Menu | Access to Copy, Paste, and Reset Style commands | Use Paste Style to sync padding and borders across nested containers instantly |
Keeping Your DOM Lean with the Navigator
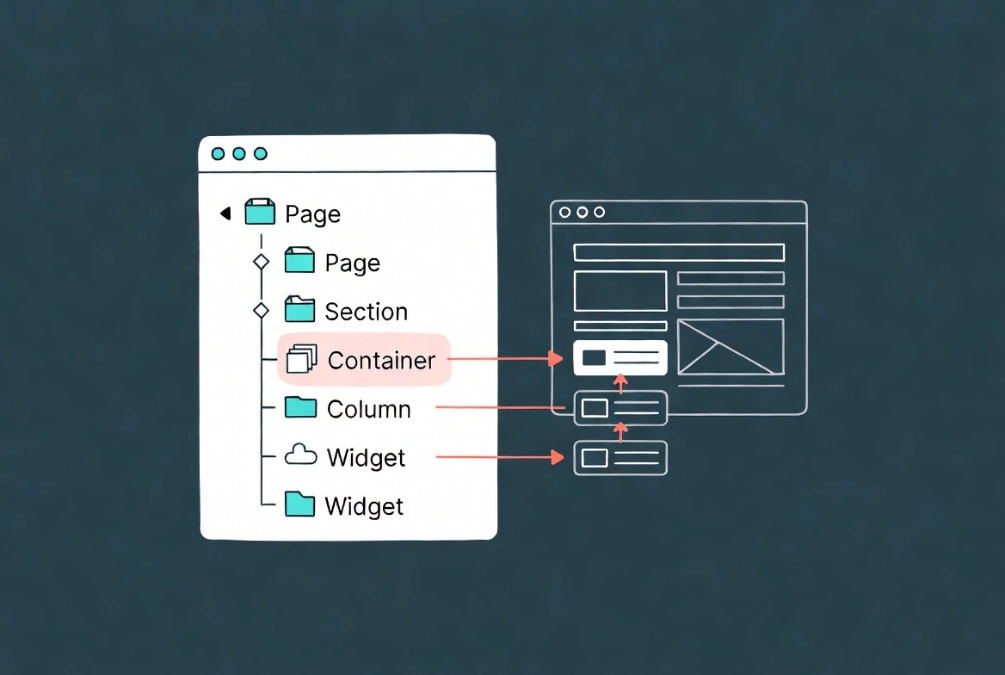
Since Elementor moved toward Flexbox and Grid containers as the standard, layouts have become more powerful and more structurally complex in equal measure. Selecting the correct level of a nested hierarchy on the canvas, choosing the parent row container rather than an individual item container, is nearly impossible with a mouse when the nesting runs three or four levels deep. The Navigator makes this trivial by showing the entire hierarchy through indentation. The container you need is always visible and always one click away regardless of how deeply it sits in the structure.
This view also makes DOM bloat visible in a way the canvas never does. Unnecessary containers that wrap a single element, extra divs that serve no layout purpose, nesting that goes four or five levels deep when two would suffice, all of these appear clearly in the Navigator tree. Every node in that list represents an HTML element the browser must parse before the page can render. Keeping the tree lean is a direct performance decision. When you see the Navigator as a live audit of your page’s code structure rather than just a selection tool, the habit of removing unnecessary layers becomes instinctive rather than something you remember to do occasionally.
Frequently Asked Questions About the Elementor Navigator
How do I open the Navigator in Elementor?
Click the Navigator icon in the bottom toolbar of the Elementor editor panel, or use the keyboard shortcut Cmd plus I on Mac or Ctrl plus I on Windows. Most experienced users keep it docked open permanently on one side of the screen so the page hierarchy is always visible while they work.
Does hiding an element in the Navigator hide it on the live site?
No. The eye icon in the Navigator hides the element from your editor view only, as a workspace convenience. It has no effect on the published page. To hide an element from visitors on specific devices, use the Responsive settings in the element’s Advanced tab instead.
Can I rename elements in the Navigator?
Yes. Double-click any element name in the Navigator list to enter edit mode and type a new name. The rename appears only in the Navigator and does not affect the HTML output of the page. It is purely an organizational tool for the editor environment, but the time it saves on complex builds and client handoffs makes it worth doing consistently from the very first element you add.
Why does the Navigator matter for page performance?
Every item visible in the Navigator represents an HTML element the browser must parse and render. A deeply nested, cluttered Navigator tree is a direct reflection of a heavy DOM, which slows page rendering and hurts Core Web Vitals scores. Using the Navigator to identify and remove unnecessary wrapper containers keeps your DOM shallow and your page fast in a way that is very difficult to audit through the visual canvas alone.
Additional Resources
- WordPress Basics and Installation: The Complete Beginner’s Guide
- Getting Started with Elementor in 2026: The Complete Guide
- Elementor Interface Tour: Understanding the Editor Panel
- How to Use Elementor Flexbox Containers: A Beginner’s Guide
- Understanding Elementor Sections, Columns, and Widgets
- Adding and Styling Images in Elementor
- Responsive Design Basics: Making Elementor Sites Mobile-Friendly
- Elementor Best Practices for Beginners
- Document Object Model: Wikipedia
- Page Structure and Headings: W3C WAI
Final Thoughts: Manage the Hierarchy, Master the Build
The shift from pointing and clicking on the canvas to managing a hierarchy in the Navigator is one of those transitions that feels small at first and turns out to be fundamental. Once you start working from the tree view, selecting elements by clicking on their name rather than hunting through overlapping layers, reordering sections by dragging a list item rather than scrolling while holding a mouse button, the canvas becomes a preview tool rather than a selection tool. That distinction alone recovers hours of work on every complex project.
Rename everything, keep the tree shallow, use the eye icon freely, and right-click habitually. These four habits turn the Navigator from a feature you know exists into an active part of your workflow. The pages you build will be faster, cleaner, and easier for anyone to maintain long after the initial build is done. If you need to revisit the WordPress foundation beneath all of this, the WordPress basics and installation guide is always a reliable place to start.