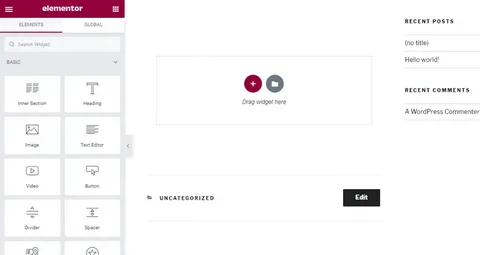
Early in my Elementor journey, I treated every widget like a new toy. A different icon pack here, a fancy countdown timer there, a custom progress bar nobody asked for. My pages looked busy, loaded slowly, and confused visitors. A senior developer looked at one of my builds and said something I still think about: “You only need ten widgets to build anything great. Everything else is decoration.” He was right. Stripping the workflow back to the core essential Elementor widgets was the change that made my builds faster, cleaner, and more effective. This guide covers those ten widgets, why each one matters, and how to use them correctly from day one. If the Elementor interface is still new, the Getting Started with Elementor guide covers the foundation first. For the WordPress layer underneath everything, the WordPress basics and installation guide is where to start.
Why Mastering Core Widgets Beats Learning Every Widget
Analysis of professional Elementor builds consistently shows that ten to twelve widgets account for over 80 percent of the visual components on a typical page. Every additional widget beyond the core set adds DOM weight, increases load time, and introduces another potential source of CSS conflict. Knowing the core widgets deeply produces better results than knowing fifty widgets superficially. Each widget here earns its place by solving a specific problem that no other widget handles as cleanly.
The 10 Essential Elementor Widgets Explained
1. Heading Widget
The Heading widget defines content hierarchy through H1 to H6 tags. This is not just a visual choice. Search engines and screen readers both use heading structure to understand page content. An H3 appearing directly after an H1 without an H2 between them breaks accessibility standards and confuses crawlers. Always assign the correct heading level based on content structure, not font size preferences. Use global typography to control appearance separately from semantic meaning.
2. Text Editor Widget
Body copy lives in the Text Editor widget, which renders clean paragraph tags in the HTML output. Its inline editing makes content updates fast without returning to the WordPress backend. One common misuse worth avoiding: designers sometimes use this widget to force smaller heading-style text by reducing font size manually. That approach breaks semantic structure. The Heading widget handles headings. The Text Editor handles paragraphs. Keeping those roles separate produces cleaner, more maintainable code.
3. Image Widget
The Image widget handles static visuals with direct controls for sizing, linking, and alt text. Alt text is non-negotiable. Missing alt attributes fail accessibility audits and cost search visibility on every image across the site. Always compress images before uploading and serve them in WebP or AVIF format. Google’s Core Web Vitals penalize oversized image files directly through the Largest Contentful Paint metric, which affects search rankings in measurable ways.
4. Button Widget
Every conversion on a website traces back to a button click. The Button widget handles links, hover states, sizing, and styling with full control through the Style tab. Action-oriented button text consistently outperforms vague alternatives in split tests. “Download Now” and “Get Started” perform significantly better than “Click Here” because they describe an outcome rather than an action. Always pull button colors from the global color palette to maintain brand consistency across the site.
5. Video Widget
The Video widget embeds YouTube, Vimeo, and self-hosted content with playback controls built in. One setting deserves careful attention: autoplay. Autoplaying video with sound violates WCAG 2.2 Success Criterion 1.4.2, which requires a mechanism to pause or stop audio that plays automatically for more than three seconds. Beyond accessibility compliance, autoplay video on mobile burns mobile data and frustrates users. Keep autoplay off unless a specific use case genuinely requires it.
6. Icon Box Widget
The Icon Box combines a scalable vector icon with a heading and description in a single structured unit. It handles feature lists, service overviews, and benefit sections more efficiently than assembling the same layout from separate widgets. SVG icons render crisply at any screen size without additional image files. Consistent use of Icon Box throughout a site creates visual cohesion that ad hoc widget combinations rarely achieve.
7. Spacer and Divider Widgets
Two widgets that solve the same category of problem in different ways. The Spacer introduces precise vertical whitespace without relying on padding overrides that break at certain breakpoints. The Divider adds a horizontal rule that visually separates content blocks. Using arbitrary padding values instead of a dedicated Spacer widget is the most common cause of responsive spacing issues in beginner builds. The guide on Using the Elementor Divider and Spacer Widgets covers both in detail.
8. Image Box Widget
Where the Icon Box uses a vector icon, the Image Box uses a photograph or illustration alongside a heading and description. Team member profiles, testimonial cards with photos, and service tiles with custom imagery all benefit from this widget’s structured layout. Image optimization matters more here than in the Icon Box because raster images carry significantly more file weight than SVGs. Always compress and resize before uploading.
9. Form Widget (Pro)
Lead generation requires the Form widget, which comes with Elementor Pro. It handles field configuration, submission actions, CRM integrations, and spam protection in one panel. Field IDs need descriptive names rather than the default random strings for any CRM mapping to work correctly. Always enable both the Honeypot and reCAPTCHA v3 for spam protection, and configure an SMTP plugin before going live to ensure email notifications actually arrive. The full setup guide is at Adding a Contact Form to Your Elementor Page.
10. Posts Widget (Pro)
Dynamic content display for blogs, news sections, and portfolio grids runs through the Posts widget. It pulls content from WordPress post types automatically, supports filtering by category and tag, and offers grid, list, and carousel layouts. The performance of this widget depends on database query efficiency. Limit the number of posts per query and use specific category filters rather than pulling all posts. Unfiltered queries on large sites produce slow load times that affect every visitor.
Best Practices Across All Widgets
| Practice | Why It Matters |
|---|---|
| Use correct heading levels | Protects SEO and screen reader accessibility |
| Add alt text to every image | Required for accessibility audits and search visibility |
| Pull colors from global palette | Makes sitewide color changes a single update |
| Test every widget on mobile | Desktop layouts rarely translate perfectly to small screens |
| Minimize widget nesting depth | Each nesting level adds DOM weight and reduces performance scores |
Final Thoughts: Build Less, Build Better
Ten widgets built with discipline produce a faster, more accessible, and more maintainable site than fifty widgets used carelessly. Every widget on this list has a specific job. Assigning the right widget to the right task, applying global styles consistently, and testing on real devices before launch separates professional builds from overcomplicated ones. Master these ten first. Everything else builds on top of them. If you need to revisit the WordPress foundation beneath all of this, the WordPress basics and installation guide is always the right place to start.
Additional Resources
- WordPress Basics and Installation: The Complete Beginner’s Guide
- Getting Started with Elementor in 2026: The Complete Guide
- Using the Elementor Divider and Spacer Widgets
- Adding a Contact Form to Your Elementor Page
- Setting Up Global Colors and Fonts in Elementor
- Responsive Design Basics: Making Elementor Sites Mobile-Friendly
- How to Install Elementor on WordPress: A Step-by-Step Guide
- WCAG 2.2 Audio Control: W3C